Personalize on the Sitecore Experience Edge for Content Hub using Uniform
Akshay Sura - Partner
20 Mar 2021
This blog post will help you set up Uniform Personalization in a truly Jamstack world. For this demo, we will be setting up Uniform on Next.js and pulling the content from the Sitecore Experience Edge for Content Hub.
We will be using one of our demo sites (The Sitecore Experience Edge for Content Hub - Content as a Service! ) to showcase Uniform personalization.
Currently Uniform does not have an integration for Sitecore Experience Edge for Content Hub. However Uniform has integration to the Sitecore Experience Platform.
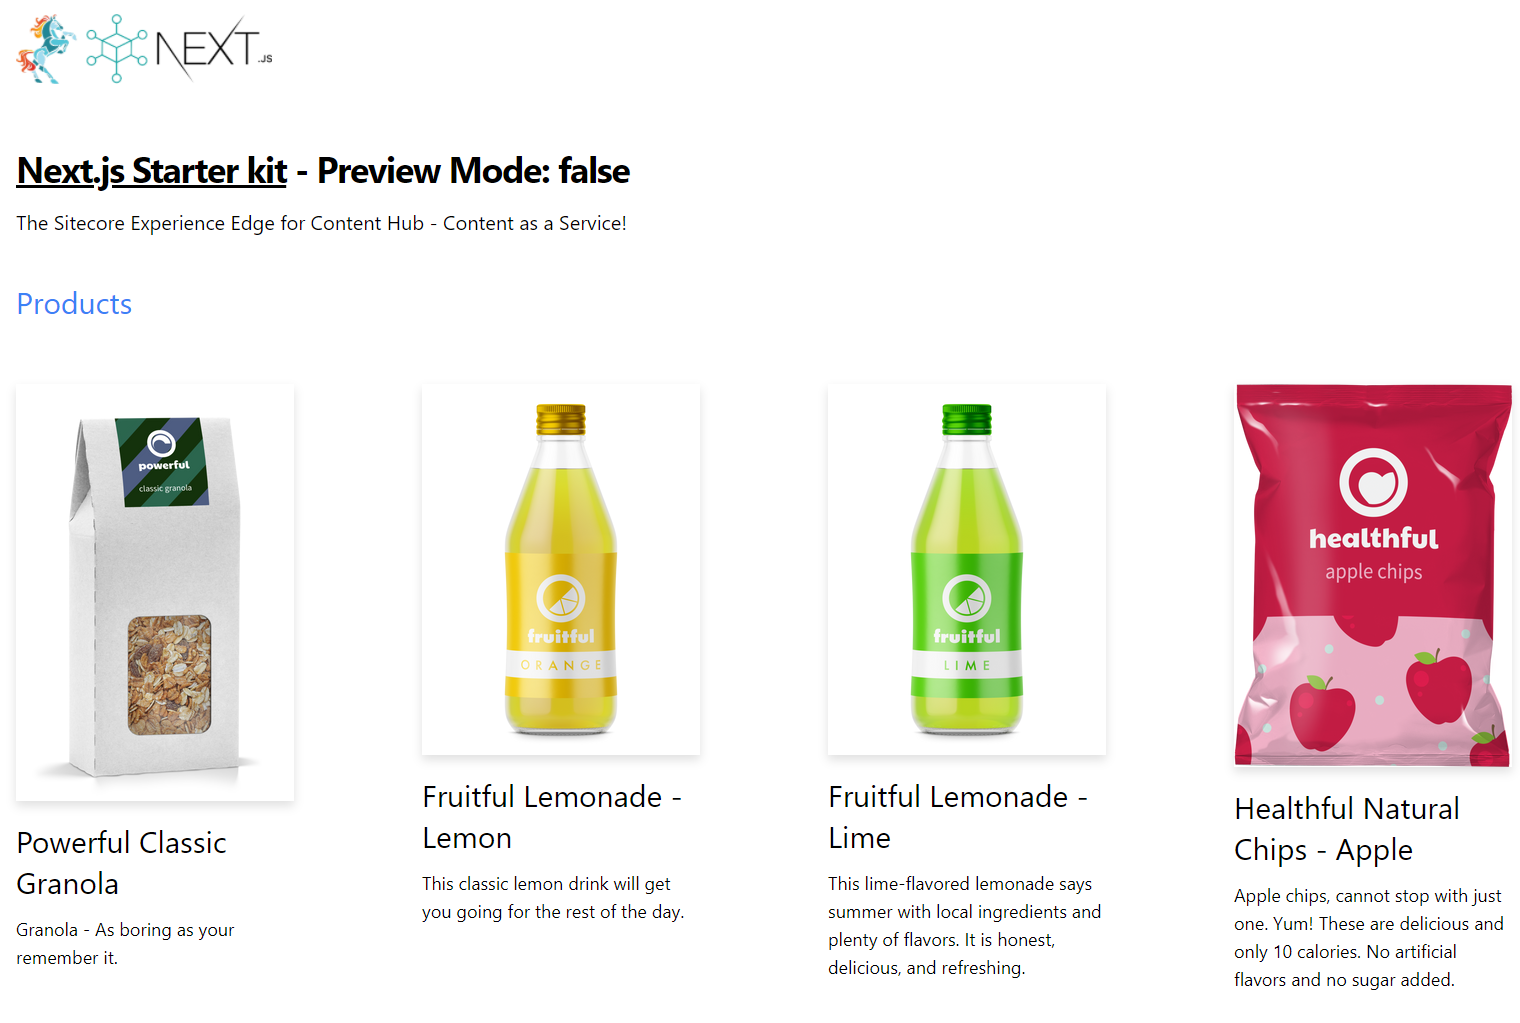
The above site was built using Next.js and the source code is publicly available on https://github.com/konabos/Next.js-Starter-kit-using-GraphQL-and-Sitecore-Content-Hub-Content-as-a-Service
You should also see your presentation on The Sitecore Experience Edge: Headless Content Delivery At-Scale, you can find the YouTube video here.
The Sitecore Experience Edge for the Sitecore Content Hub is the best way to deliver Omnichannel experiences.
First in our code base which is Next.js based, install the packages needed. Run the following commands:
yarn add @uniformdev/optimize-tracker-react yarn add @uniformdev/optimize-tracker-browser yarn add --dev @uniformdev/cli
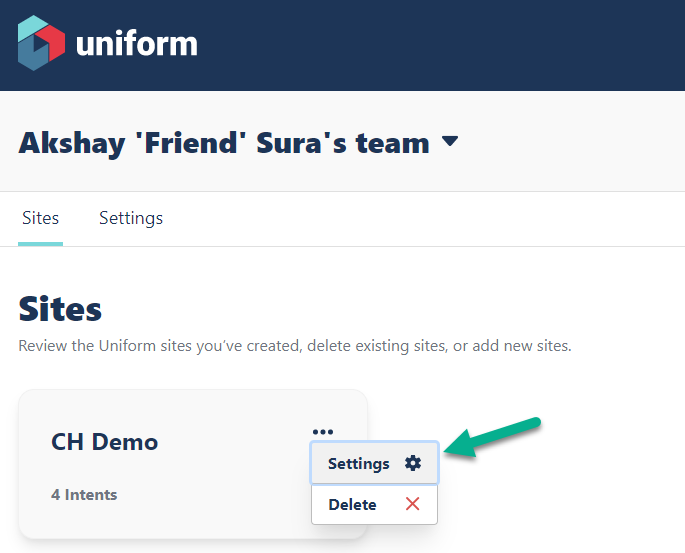
Login to Uniform.app and select your site settings.
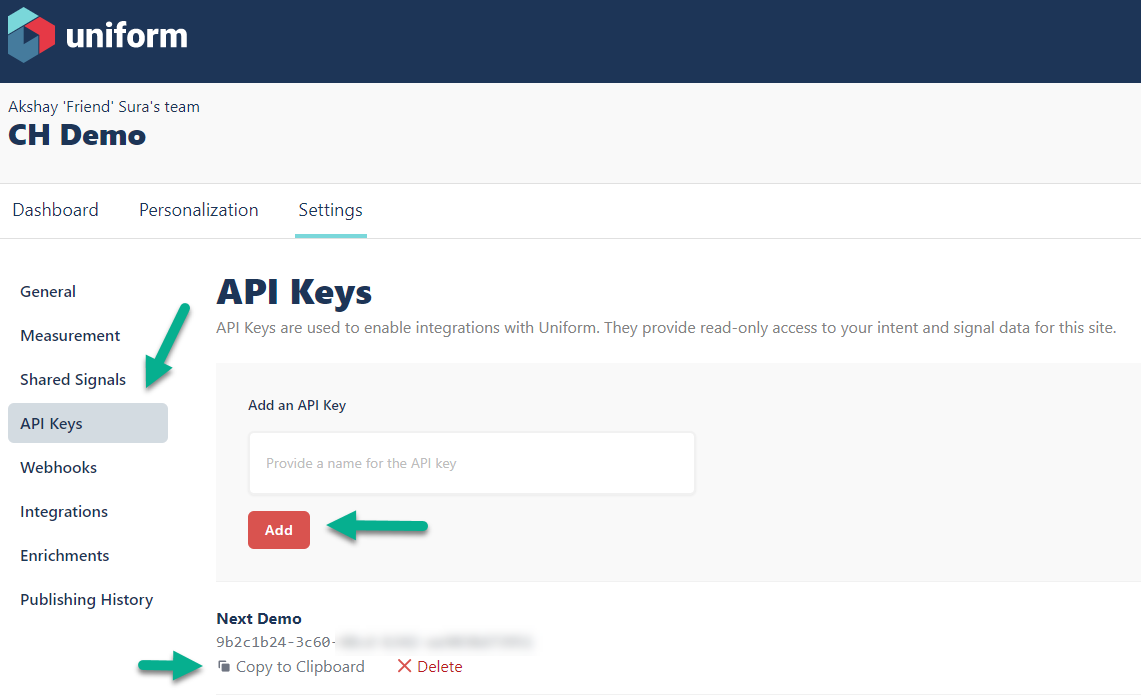
Add a new API key or copy an existing one.
Next, add the following to the scripts of your packages.json. This script will let you generate your personalization intents from Uniform and include it as part of your build.
"generate:intents": "uniform optimize manifest download --output ./lib/intentManifest.json --apiKey YOUR_API_KEY"
Now let us head back to the Uniform.app website and setup some intents. In our case we are focusing on the Product Family from Content Hub PCM (Product Content Management).
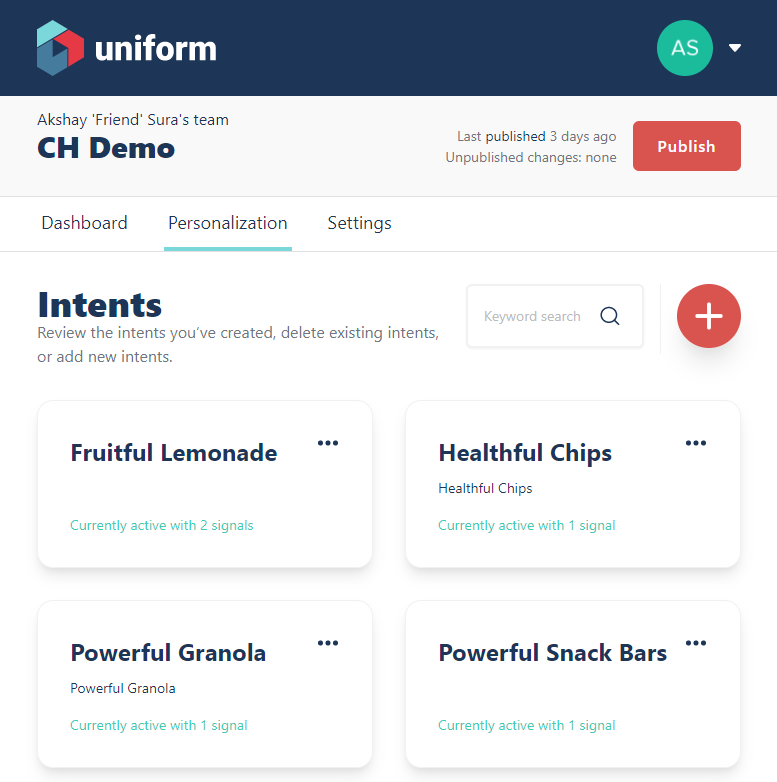
In the above image, you can see that we have set up one intent per product family in Content Hub.
The critical part is that the key you use for these intents has to match your taxonomy in the destination system, in this case, it is the Content Hub Product families.
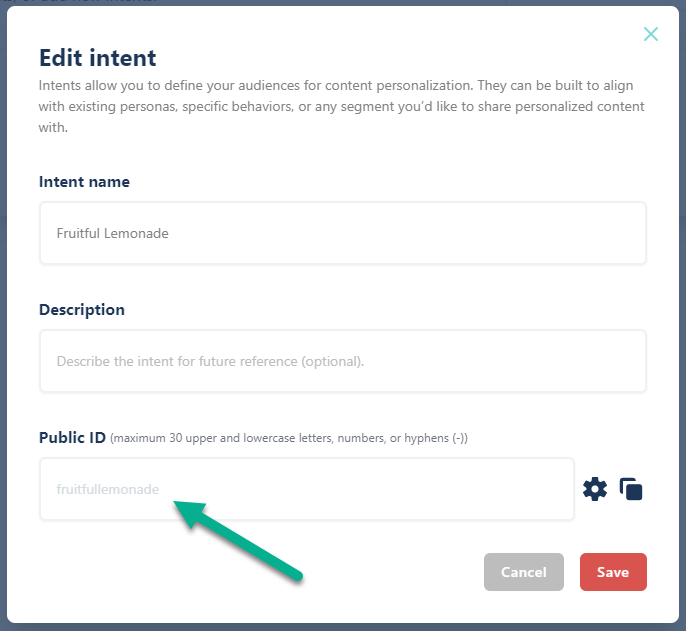
Once you have the intent, we need to add the signals. We will get into the depths of Uniform in a later blog or video.
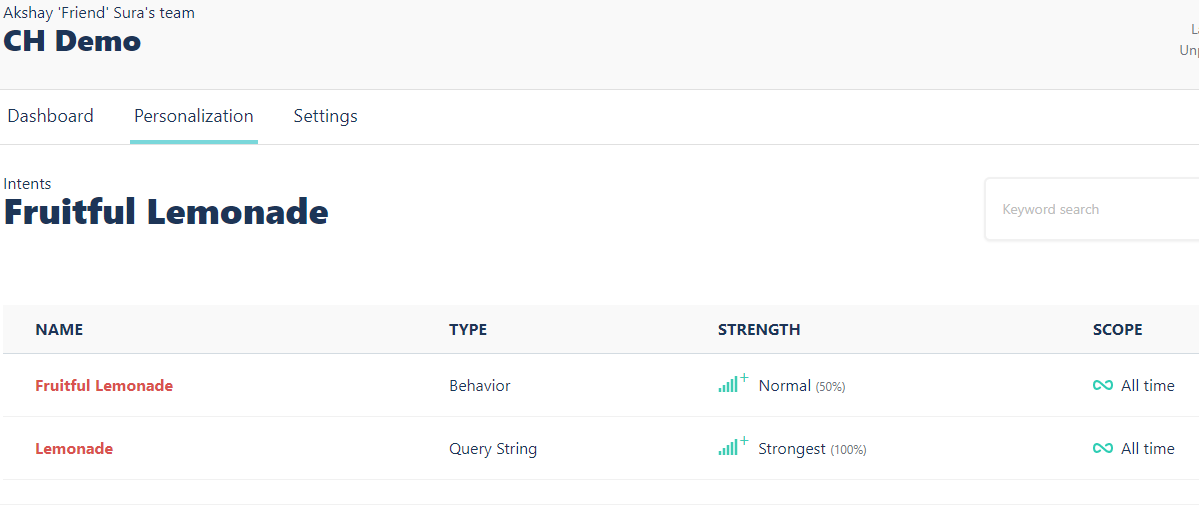
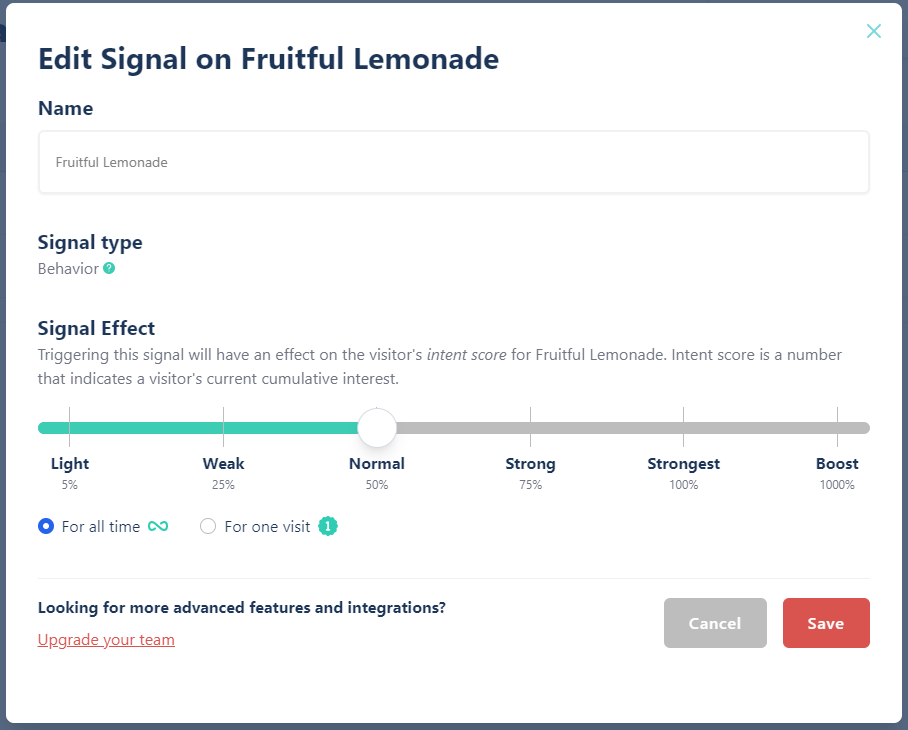
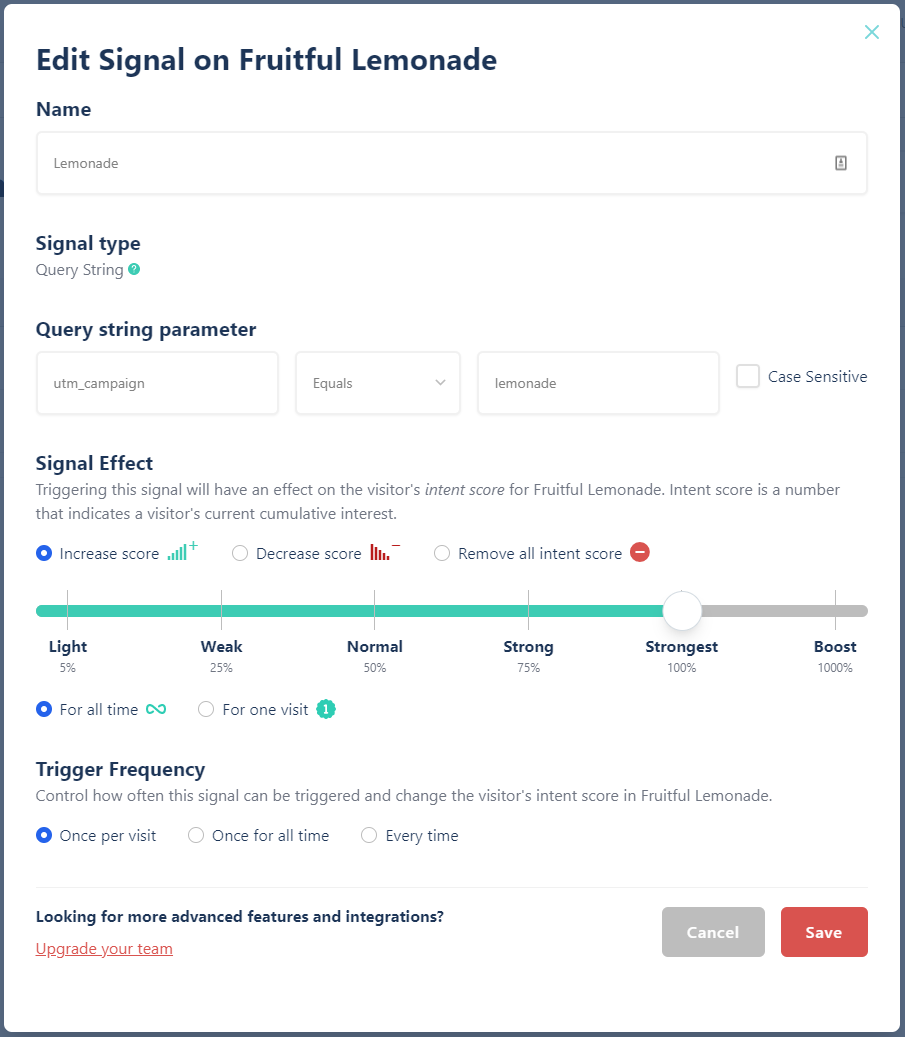
Here we have one signal that is based on behavior and one that is triggered by a campaign querystring.
Now that we have our intents setup, we need to generate these intents and include them as part of our build. To do that, run the following command which utilizes the script we added to the packages.json.
yarn generate:intents
This command will generate the intents into ./lib/intentManifest.json file.
{ "site": { "sampleSize": 0, "intents": [ { "id": "powerfulgranola", "signals": [ { "type": "BEH", "freq": "always", "scope": "visitor", "str": 50 } ] }, { "id": "healthfulchips", "signals": [ { "type": "BEH", "freq": "always", "scope": "visitor", "str": 50 } ] }, { "id": "fruitfullemonade", "signals": [ { "type": "QS", "freq": "visit", "scope": "visitor", "str": 100, "value": { "cs": false, "expr": "lemonade", "type": "exact" }, "parameter": "utm_campaign" }, { "type": "BEH", "freq": "always", "scope": "visitor", "str": 50 } ] }, { "id": "powerfulsnackbars", "signals": [ { "type": "BEH", "freq": "always", "scope": "visitor", "str": 50 } ] } ], "enrichments": [] } }
Now that we have things set up, it is time to use this information to capture behavior. To do this, add the following in your component to capture behavior. You can find this code on GitHub line 12.
import { useBehaviorTracking } from '@uniformdev/optimize-tracker-react'; useBehaviorTracking(category.intentTag);
Be sure to pass in the tag to match the Uniform tag for intents. In our case, we are passing in the parsed Category (Product Family).
We now have a good way of capturing behavior. Now let us set up something on the home page which will use the user's behavior and display the personalized content. You can find this code on GitHub on line 29.
import { Personalize } from '@uniformdev/optimize-tracker-react'; <Personalize variations={props.categories}> {({ variations }) => { return ( <> {variations.map((category, index) => ( <ProductCategory category={category} key={index} trackBehavior={false} /> ))} </> ); }} </Personalize>
We need to use to Personalize tag and pass in the variations. Normally if your component just expects the final attributes you could have just specified the component attribute on the Personalize component. We however expect a type of productCategoryI and so we need to write additional code to pass the right type.
Now the final result.
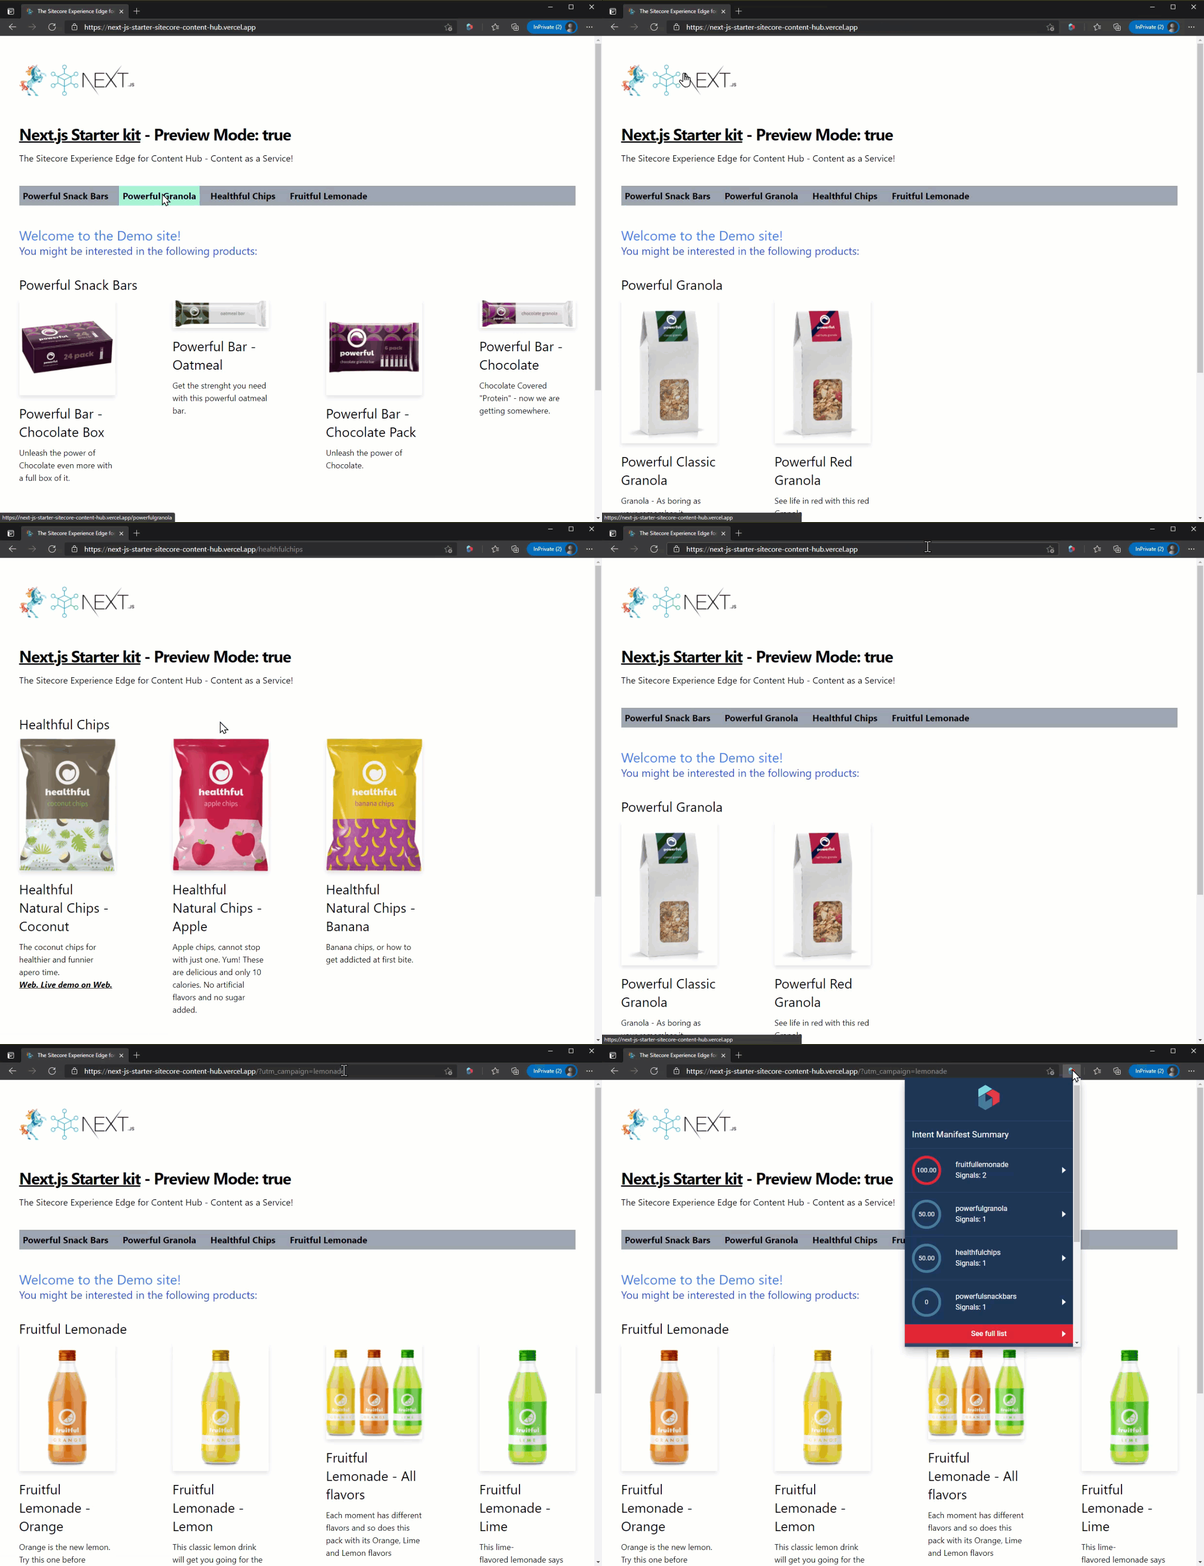
Visit The Sitecore Experience Edge for Content Hub - Content as a Service! and try for yourself.
If you have any questions, please get in touch with me. @akshaysura13 on Twitter or on Slack.
Useful Links:
- Next.js Starter kit using GraphQL and Sitecore Content Hub - Content as a Service!
- The Sitecore Experience Edge: Headless Content Delivery At-Scale
- Querying Sitecore Experience Edge using the GraphQL endpoint
- Publish to the Delivery Platform using Sitecore Experience Edge and Content Hub
Community Landing Page

Akshay Sura
Akshay is a nine-time Sitecore MVP and a two-time Kontent.ai. In addition to his work as a solution architect, Akshay is also one of the founders of SUGCON North America 2015, SUGCON India 2018 & 2019, Unofficial Sitecore Training, and Sitecore Slack.
Akshay founded and continues to run the Sitecore Hackathon. As one of the founding partners of Konabos Consulting, Akshay will continue to work with clients to lead projects and mentor their existing teams.

Share on social media