Empower your content creators with Web Spotlight by Kontent
Akshay Sura - Partner
16 Feb 2021
In the Headless CMS world, content is modeled, structured, and created with multi-channel in mind. In many cases the primary consumer of this content are websites. I do not see this changing any time soon.
We still need to provide the ability of in-context website management to our content editors. A typical Headless CMS vendor does not provide a tool for editing a website inline. There are several tools on the market, one such tool is Stackbit.
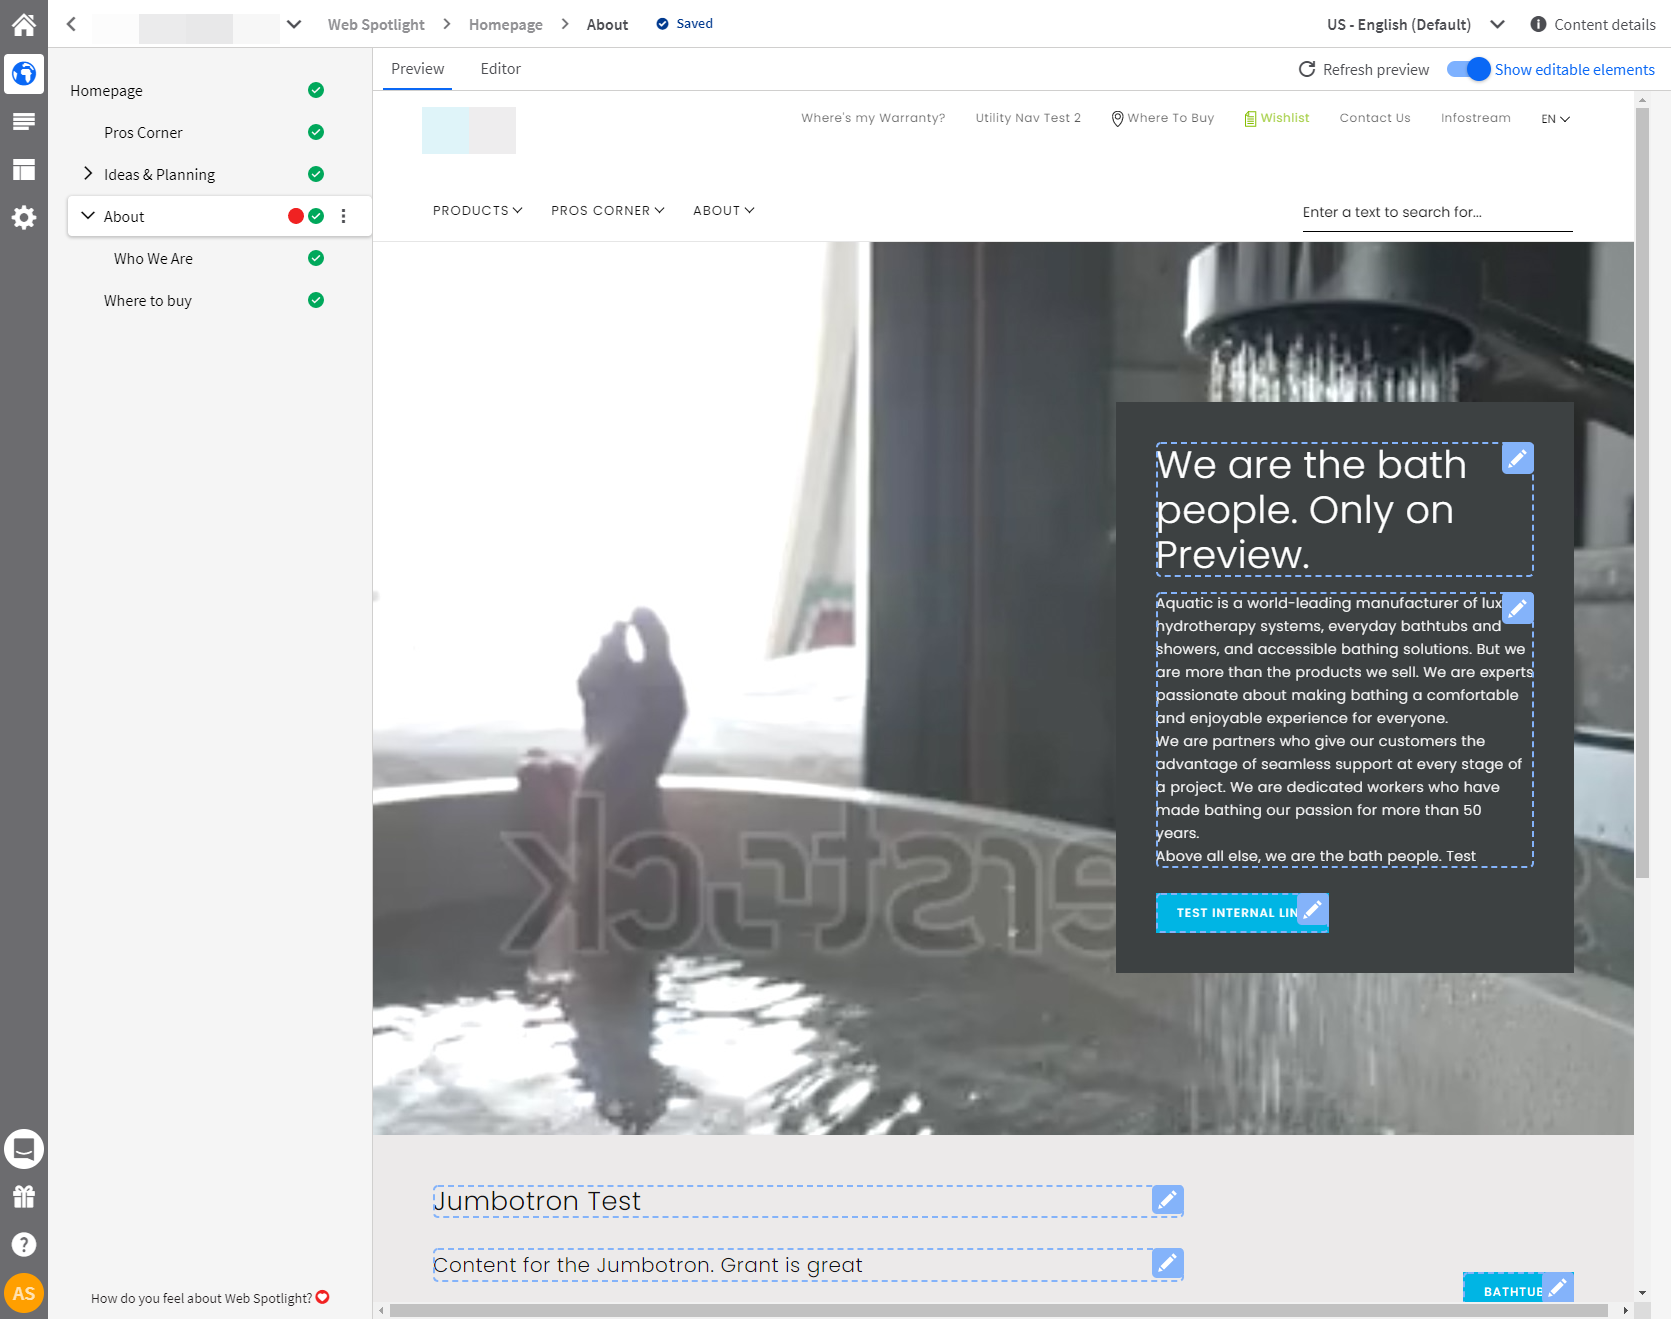
Our current project is based on Kentico Kontent Headless CMS. Fortunately for us and the client, Kontent provided Web Spotlight.
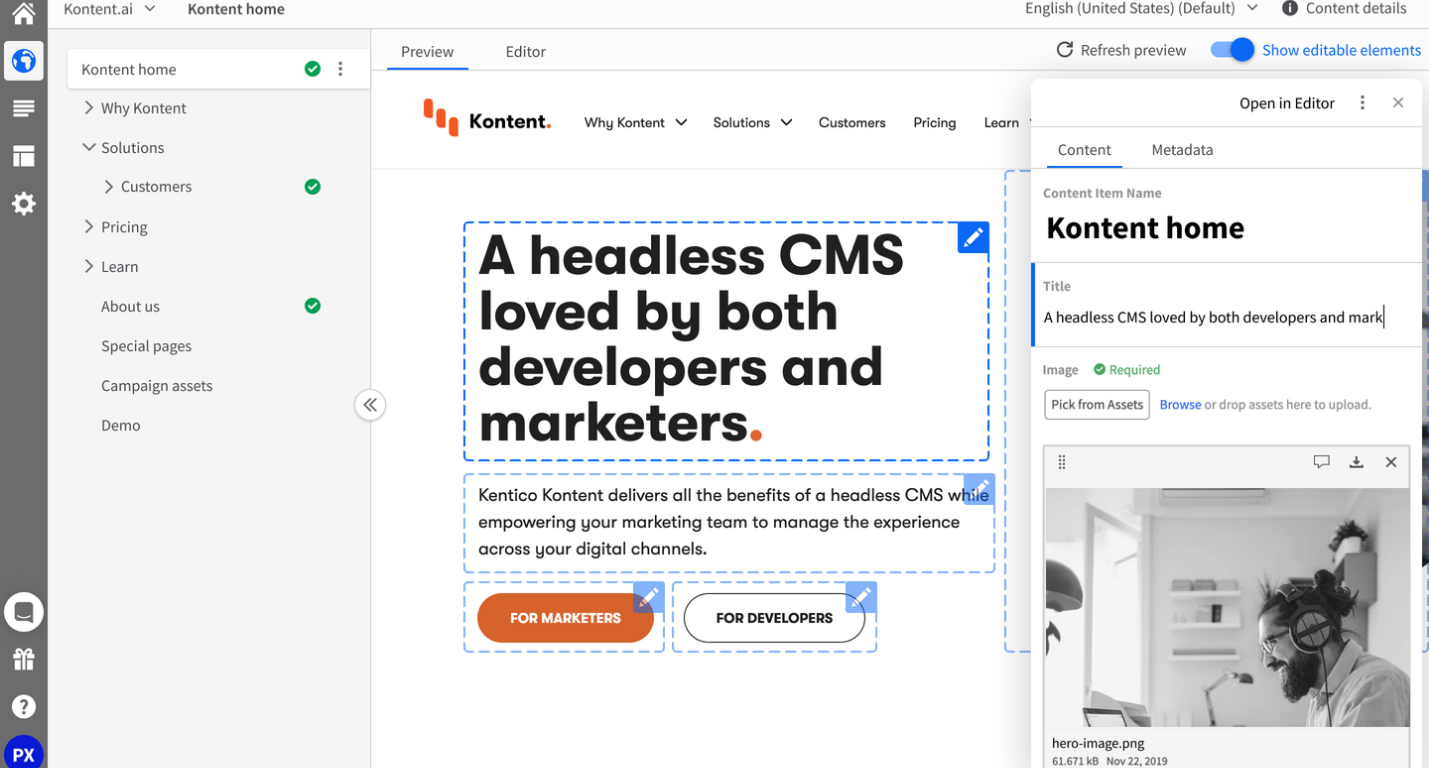
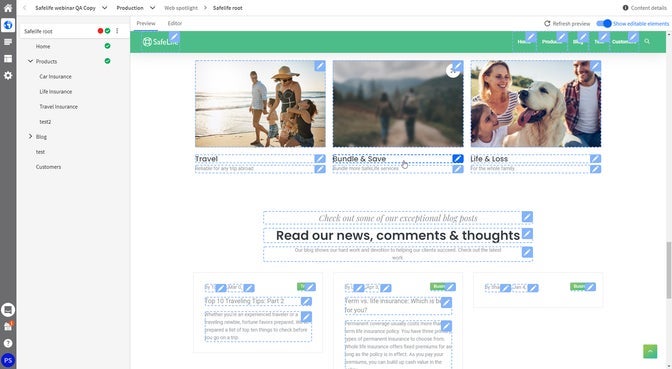
Web Spotlight lets you manage your web pages and rearrange components without any developer involvement. You can update the website content in-context live editing.
Another great feature is that you can setup a page hierarchy for your website using the page tree.
Getting your site ready for Web Spotlight takes a few minutes of help from your developer friends. We will walk through what a developer would need to do in order to enable Web Spotlight.
Documentation
I am always blown away by how well these modern systems are documented. You can find more information on Web Spotlight and the Smart Link SDK using the links below:
- Web Spotlight
- Smart link SDK
- Set up editing content directly from the preview
Setup
Today we are going to take a look at how to set up the Smart Link SDK in a Next.js project. This would take you a few minutes to set up.
First, run the following npm command in your Nex.js project.
npm i @kentico/kontent-smart-link
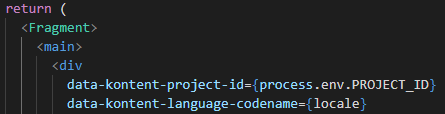
Once that is done, open your _app.(tsx/jsx) in your pages folder. If you do not an _app file, create one. Add the initialize and destroy commands as shown below.
import '../styles/scss/Main.scss'; import KontentSmartLink from '@kentico/kontent-smart-ink'; import '@kentico/kontent-smart-link/dist/kontent-smart-link.styles.css'; import { useEffect } from 'react'; function MyApp({ Component, pageProps }) { useEffect(() => { const kontentSmartLink = KontentSmartLink.initialize({ queryParam: 'preview-mode', }); return () => { kontentSmartLink.destroy(); }; }); return <Component {...pageProps} />; } export default MyApp;
Next, we need to either add data-kontent-project-id (your project id) and data-kontent-language-codename (your default locale is 'default') attributes to your <body> tag or any tag which acts as a container to your whole web page. You could do this in you _document.tsx but if you are relying on dynamic calls to get the page attributes, it gets a bit tricky.
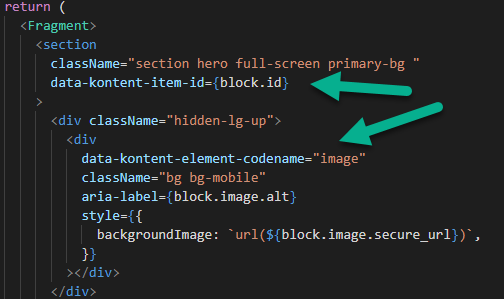
Next, we add data-kontent-item-id attribute to your component that represents an item.
Next, we add the data-kontent-element-codename attribute for each field you want to be editable by specifying the field's codename.
Once that is all set and deployed, you would set up your preview url for the page type in your Kontent settings.

Then head on over to your Web Spotlight and open up the page.
Enjoy the seamless live editing!
If you have any questions, please get in touch with me. @akshaysura13 on Twitter or on Slack.

Akshay Sura
Akshay is a ten-time Sitecore MVP and a two-time Kontent.ai. In addition to his work as a solution architect, Akshay is also one of the founders of SUGCON North America 2015, SUGCON India 2018 & 2019, Unofficial Sitecore Training, and Sitecore Slack.
Akshay founded and continues to run the Sitecore Hackathon. As one of the founding partners of Konabos Consulting, Akshay will continue to work with clients, leading projects and mentoring their existing teams.
Share on social media