
Creating Custom Element Extensions for Kentico Kontent
Akshay Sura - Partner
18 Feb 2021
Creating a Custom Element Extension for Kentico Kontent is very simple and straightforward. A Custom Element is a field type used to store content inside the Kontent Admin.
The process to create a Custom Element is well documented. Use the links below:
- Custom elements JS API
- Extend the content editing features with custom elements
- Examples of Custom Element Extensions for Kentico Kontent
- Custom element sample gallery
I will walk you through the creation of a Custom Element I recently built for one of our projects.
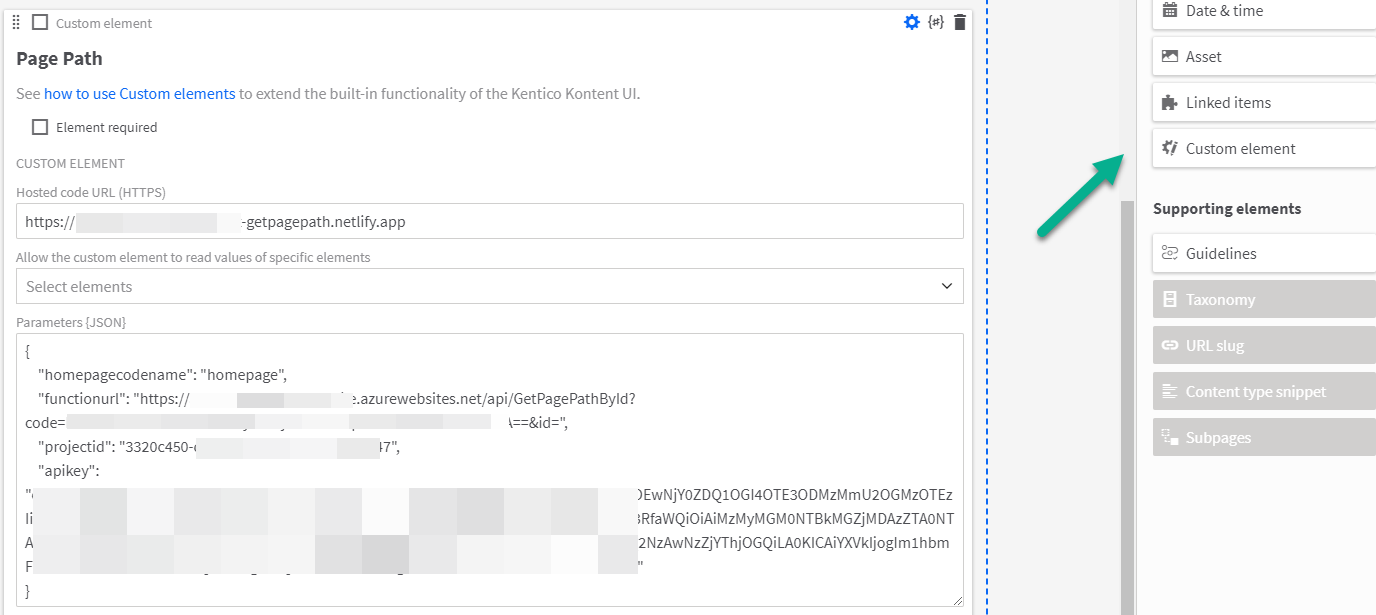
The Custom Elements are loaded into the Kontent interface via an iframe. The url specified for the Custom Element has to be https (secure).
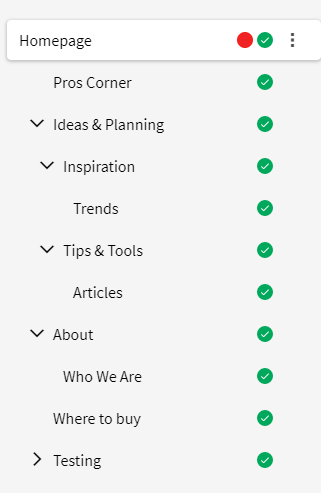
The requirement was for us to be able to detect the path of a page which was added using the Web Spotlight feature. These pages are typically hierarchical and in order for us to set the dynamic routing in Next.js, we need to know the entire path. Here is the process:
- When the control is loaded, we would need to get the config to talk to an Azure Function
- We pass the Azure function, the current Item's code name along with the current language
- The Azure Function uses the Management API to determine the hierarchy
- The Azure Function returns the path
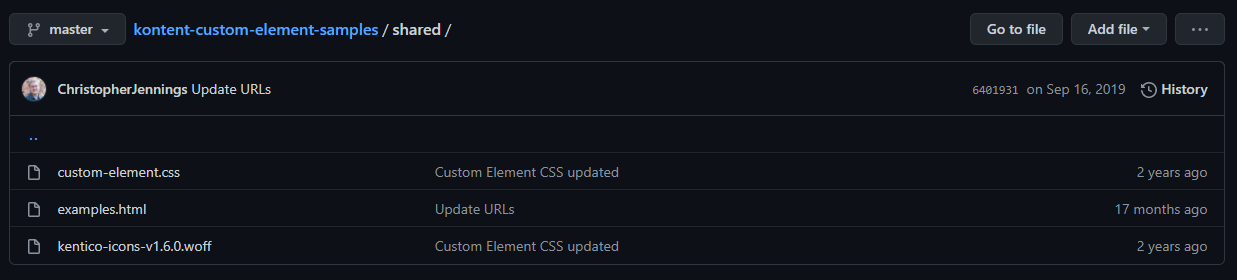
First clone the repository https://github.com/Kentico/kontent-custom-element-samples.
Create your repository based on the Shared folder in the repository above. You could also base your repo on an existing element's repo. I picked a custom element that resembles part of the functionality I was trying to achieve.
Here is the link to the hosted version of the examples page: https://kentico.github.io/kontent-custom-element-samples/shared/examples.html
1. Create the page which represents your custom element
Create a new HTML page with the following markup.
<!DOCTYPE html> <html lang="en"> <head> <meta charset="UTF-8"> <title>Item Path textbox</title> <!-- Include jQuery library --> <script src="https://cdn.jsdelivr.net/npm/jquery@3.3.1/dist/jquery.min.js"></script> <!-- Include the Custom Elements API--> <script src="https://app.kontent.ai/js-api/custom-element.js"></script> <link rel="stylesheet" href="./custom-element.css" /> </head> <body> <div class="disabled_overlay"></div> <div class="text-field text-field--has-button" style="border-bottom:1px solid #e0e0e0"> <div class="text-field__input u-transparent-border u-no-left-padding"> <div id="unique" class="notranslate public-DraftEditor-content" contenteditable="true" placeholder="Empty" role="textbox" spellcheck="false" style="outline: none; user-select: text; overflow-wrap: break-word;"></div> </div> </div> <div id="unique-status" class="status-checking item-status">checking</div> </body> </html>
Notice that we included the jQuery library, the Custom Elements API, and also the default Custom Element CSS file. I also added the form field.
2. Initialize the Custom Element
We now have to add the initCustomElement function which gets called from the parent, in this case, the Kontent interface. This call passing us the element info (current instance of our element with a value, disabled, etc), _context (the current context which includes item id, codename, language information, etc)
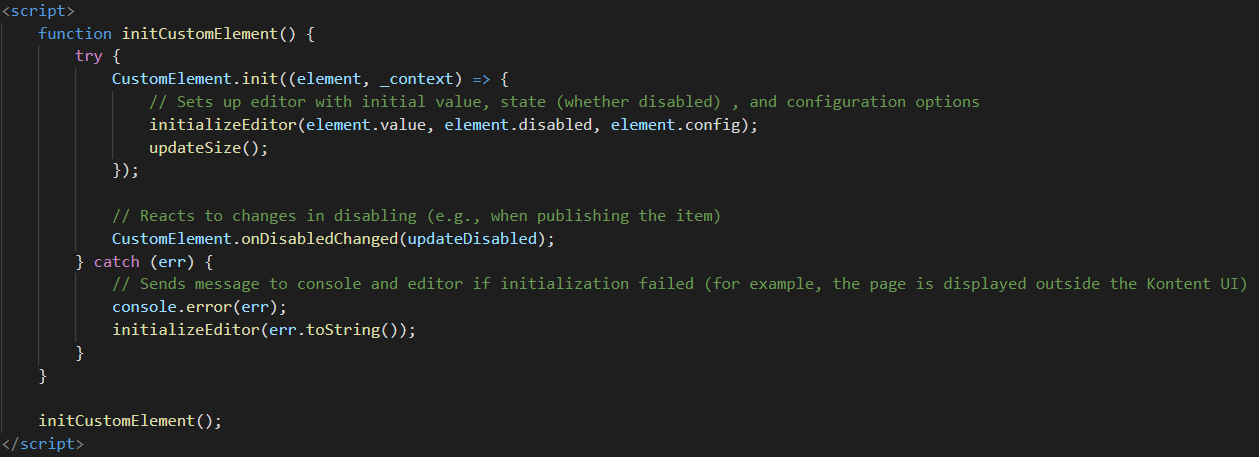
We also get the onDisabledChanged method which detects the changes of the current element's state. We will come back to this step and add additional code.
3. Set the Size
We need a function which we can use to calculate the size of the Element. The sizing can get complicated depending on the Custom Element. For our simple Custom Element, it is easy.
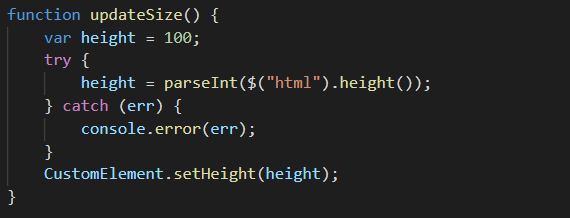
Notice that we have access to the CustomElement object to make the changes.
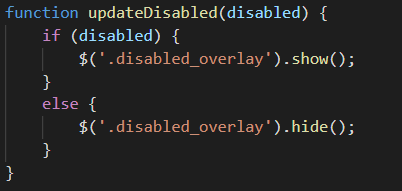
4. Disable appropriately
Depending on if we are in edit mode or read-only mode, our Custom Element should be able to switch between enabled and disabled modes. I do have a updateDisabled function but for our Custom Element, I keep the element disabled at all times.
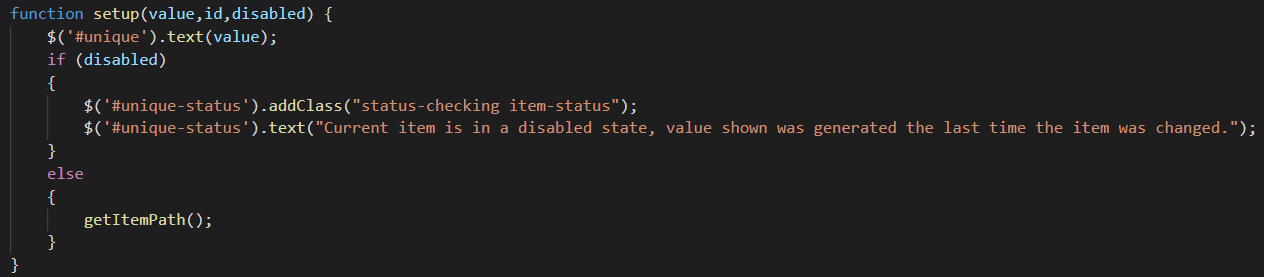
5. Initial Value
We need a function that set's up the Custom Element and does the processing. I have the following setup function which takes in the values from the initialize function and sets the text value.
6. The rest
We took care of most of the functionality with the above steps but now it is time to wrap it up.
The following is a function to make an AJAX call to our Azure Function and retrieve the path.
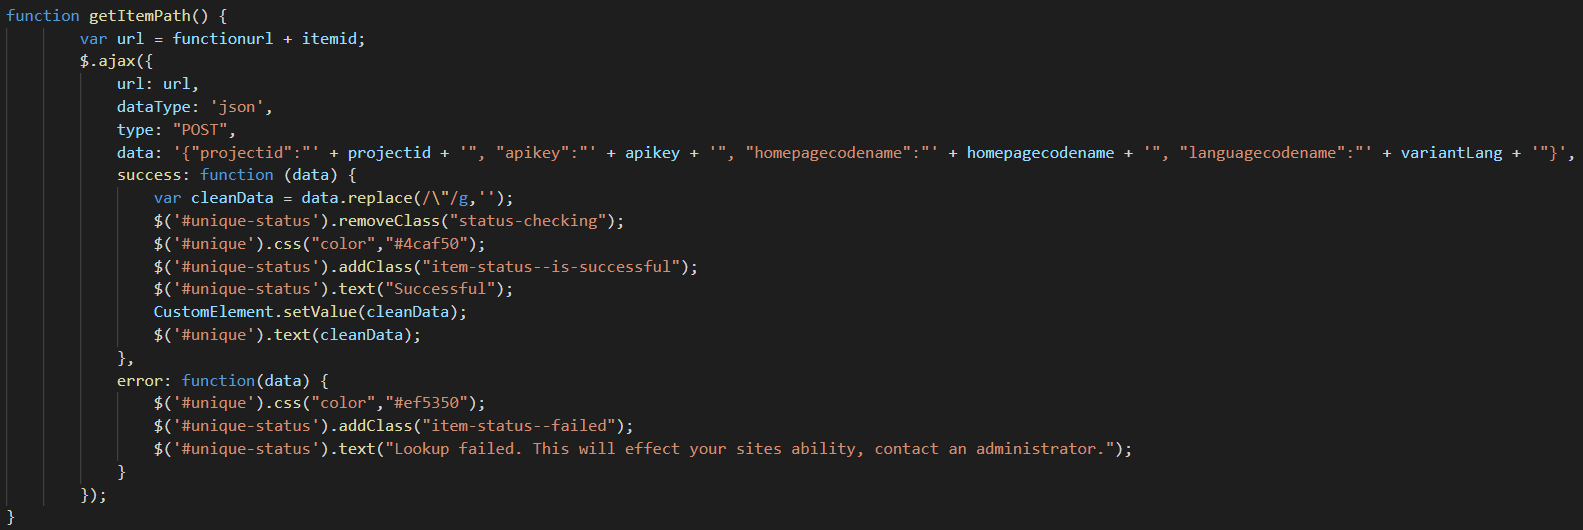
Notice that we are setting the value of the Custom Element once we get a successful return from the Azure Function.
Let us head back to our initCustomElement function and make some changes.
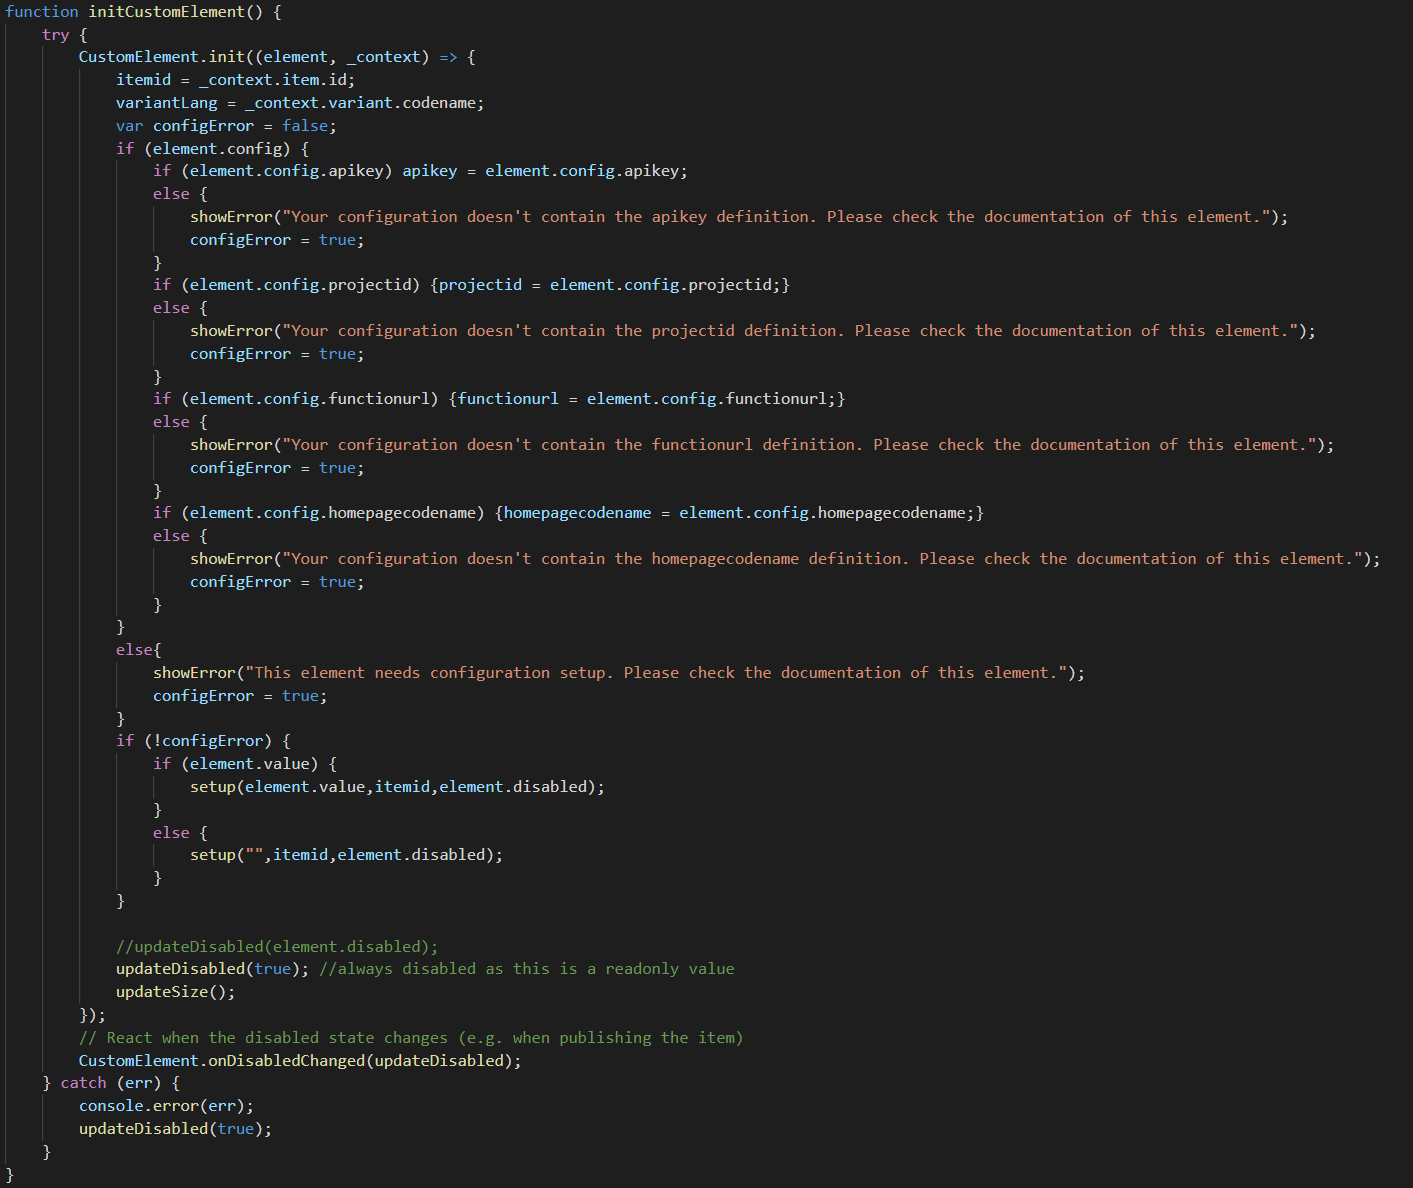
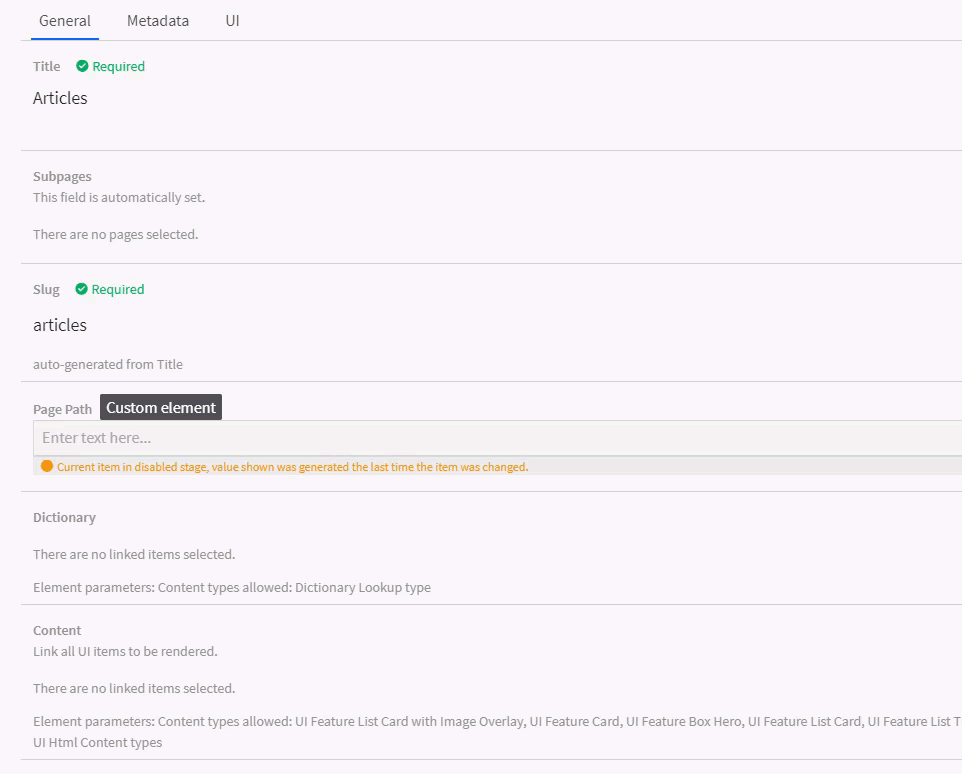
Notice that we are expecting some configuration with the Custom Element. Until we get all the config, we cannot proceed.
Add a few custom styles and boom! We got ourselves a working custom element that gets the config elements, and figures out our content path.
Here is the full source:
<!DOCTYPE html> <html lang="en"> <head> <meta charset="UTF-8"> <title>Item Path textbox</title> <!-- Include jQuery library --> <script src="https://cdn.jsdelivr.net/npm/jquery@3.3.1/dist/jquery.min.js"></script> <!-- Include the Custom Elements API--> <script src="https://app.kontent.ai/js-api/custom-element.js"></script> <link rel="stylesheet" href="./custom-element.css" /> <!-- Custom element CSS styles --> <style> /* We recommended you always set margin to zero to avoid problems when displaying the element in UI */ @import url(https://fonts.googleapis.com/css?family=Source+Sans+Pro:400,700,400italic,700italic); html{ font-family:sans-serif; -ms-text-size-adjust:100%; -webkit-text-size-adjust:100%; } body { margin: 0; overflow-y: hidden; overflow-x: hidden; } [contenteditable=true]:empty:before{ content: attr(placeholder); color: #aaa; display: block; /* For Firefox */ } .status-checking { color: #ff9800; } .disabled_overlay { position: fixed; background-color: #777; z-index: 10; cursor: not-allowed; top: 0; left: 0; width: 100%; height: 100%; opacity: 0.1; } </style> </head> <body> <div class="disabled_overlay"></div> <div class="text-field text-field--has-button" style="border-bottom:1px solid #e0e0e0"> <div class="text-field__input u-transparent-border u-no-left-padding"> <div id="unique" class="notranslate public-DraftEditor-content" contenteditable="true" placeholder="Empty" role="textbox" spellcheck="false" style="outline: none; user-select: text; overflow-wrap: break-word;"></div> </div> </div> <div id="unique-status" class="status-checking item-status">checking</div> <script> var apikey = ''; var itemid = ''; var projectid = ''; var variantLang = ''; var functionurl = ''; var homepagecodename = ''; function updateDisabled(disabled) { if (disabled) { $('.disabled_overlay').show(); } else { $('.disabled_overlay').hide(); } } function setup(value,id,disabled) { $('#unique').text(value); if (disabled) { $('#unique-status').addClass("status-checking item-status"); $('#unique-status').text("Current item is in a disabled state, value shown was generated the last time the item was changed."); } else { getItemPath(); } } function updateSize() { var height = 100; try { height = parseInt($("html").height()); } catch (err) { console.error(err); } CustomElement.setHeight(height); } function initCustomElement() { try { CustomElement.init((element, _context) => { itemid = _context.item.id; variantLang = _context.variant.codename; var configError = false; if (element.config) { if (element.config.apikey) apikey = element.config.apikey; else { showError("Your configuration doesn't contain the apikey definition. Please check the documentation of this element."); configError = true; } if (element.config.projectid) {projectid = element.config.projectid;} else { showError("Your configuration doesn't contain the projectid definition. Please check the documentation of this element."); configError = true; } if (element.config.functionurl) {functionurl = element.config.functionurl;} else { showError("Your configuration doesn't contain the functionurl definition. Please check the documentation of this element."); configError = true; } if (element.config.homepagecodename) {homepagecodename = element.config.homepagecodename;} else { showError("Your configuration doesn't contain the homepagecodename definition. Please check the documentation of this element."); configError = true; } } else{ showError("This element needs configuration setup. Please check the documentation of this element."); configError = true; } if (!configError) { if (element.value) { setup(element.value,itemid,element.disabled); } else { setup("",itemid,element.disabled); } } //should be updateDisabled(element.disabled); updateDisabled(true); //always disabled as this is a readonly value updateSize(); }); // React when the disabled state changes (e.g. when publishing the item) CustomElement.onDisabledChanged(updateDisabled); } catch (err) { console.error(err); updateDisabled(true); } } initCustomElement(); function getItemPath() { var url = functionurl + itemid; $.ajax({ url: url, dataType: 'json', type: "POST", data: '{"projectid":"' + projectid + '", "apikey":"' + apikey + '", "homepagecodename":"' + homepagecodename + '", "languagecodename":"' + variantLang + '"}', success: function (data) { var cleanData = data.replace(/\"/g,''); $('#unique-status').removeClass("status-checking"); $('#unique').css("color","#4caf50"); $('#unique-status').addClass("item-status--is-successful"); $('#unique-status').text("Successful"); CustomElement.setValue(cleanData); $('#unique').text(cleanData); }, error: function(data) { $('#unique').css("color","#ef5350"); $('#unique-status').addClass("item-status--failed"); $('#unique-status').text("Lookup failed. This will effect your sites ability, contact an administrator."); } }); } function showError(message) { $('#unique').hide(); $('#unique').css("color","#ef5350"); $('#unique-status').addClass("item-status--failed"); $('#unique-status').text(message); } </script> </body> </html>
If you have any questions, please get in touch with me. @akshaysura13 on Twitter or on Slack.

Akshay Sura
Akshay is a ten-time Sitecore MVP and a two-time Kontent.ai. In addition to his work as a solution architect, Akshay is also one of the founders of SUGCON North America 2015, SUGCON India 2018 & 2019, Unofficial Sitecore Training, and Sitecore Slack.
Akshay founded and continues to run the Sitecore Hackathon. As one of the founding partners of Konabos Consulting, Akshay will continue to work with clients, leading projects and mentoring their existing teams.
Share on social media