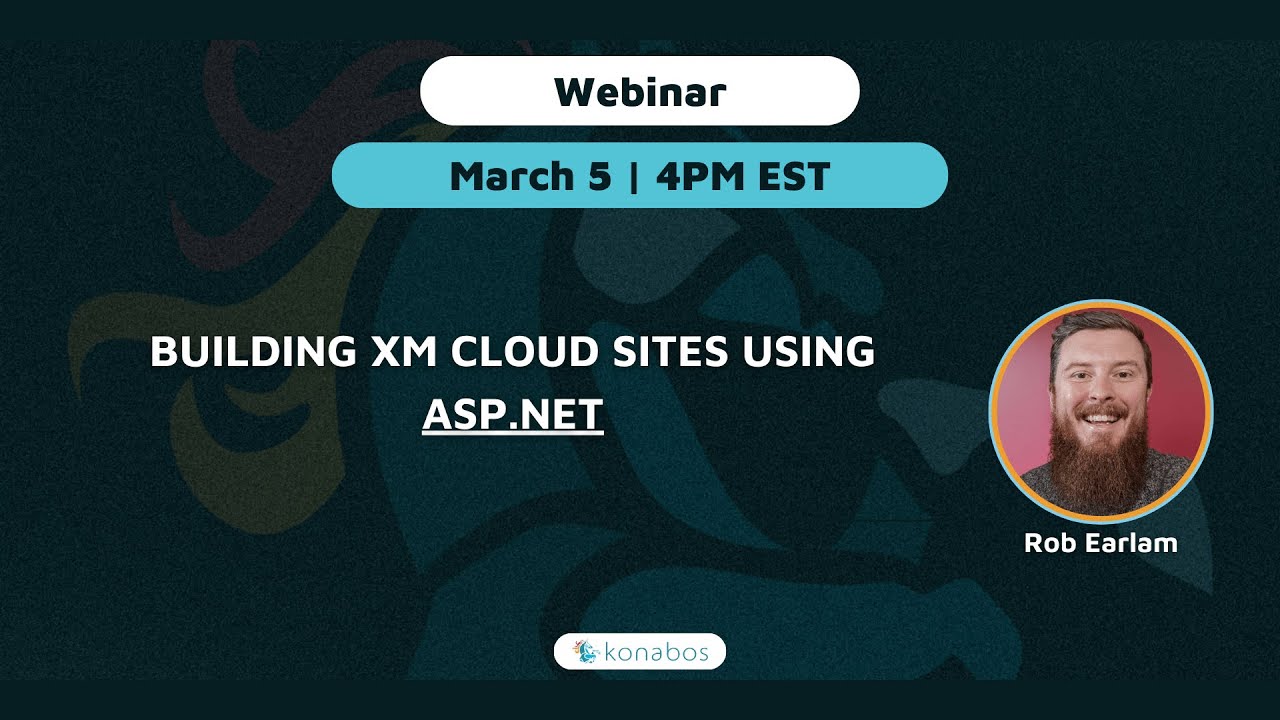
Building XM Cloud sites using ASP.NET
Konabos Inc. - Konabos
5 Mar 2025
Note: The following is the transcription of the video produced by an automated transcription system.
Hey everyone, welcome to the next webinar building XM cloud sites using asp.net with Rob Earlam. We were just chatting up. It's been a really, really long time since I've seen Rob in person. But to start off, Rob like I know for the longest time, I've been doing Sitecore since 2007 but it's always been.net and then late last decade, you know, things started coming out, like JSs came out, and there was a focus on, you know, the the JS frameworks like React, Angular view and things. And even though, I think there was, there was always an SDK for the.net rendering host. But no one really like advertised it, I guess, as much as they should have. So it kind of got lost. Or people kind of assume that if you're going to build a site nowadays which is headless, you only think of next year's for whatever reason. And they are still companies and developers who dedicate themselves to the.net stack that need is.net in the sense, you know, if a company has an Azure based thing and they are pure.net shop, they might want to build the site on.net and not many people know, and I was asking your million questions the other day. So this is, this is in a very, very timely fashion. So setting it all up that this is all about building everything in asp.net with the XM cloud. So all yours. Rob, thanks. Actually, you're dead, right? So I spoke at symposium last year kind of about a little bit about the history of building with Sitecore, and I told us a lot about what you were just saying. You know, we started off 100 percent.net it was all asp.net framework. And then, yeah, about five, six years ago, it all kind of switched over towards Dex, JS and Angular and Vue. But in reality, we've got a really rich history week.net and it kind of got pushed to the side of it. And this is what I talked about at symposium last year. And if anyone wants to link that session, I've done it for a few years boots, and I'm happy to share that afterwards.
When you asked me to come and speak, I thought of basically, kind of doing a follow up to that session. So I'm not going to touch too much on the history here. I just wanted to talk a little bit about what it is like day to day building with ASP NET Core now instead of ASP NET Framework, but yeah, building with ASP net for XM cloud. So that's kind of what we're going to dig into today. So before we get started, too far for anyone who hasn't met me before, my name's Rob Earlam. I been with Sitecore for about nine years now, in a bunch of different roles, currently head of developer advocacy for Sitecore. Basically long and the short of it is, it's my role to try and make every developer building with our product successful. You can see a bunch of social links on the screen there. So if anyone wants to get into a chapter or has any questions, feel free to give me a shout. So ASP, NET Core, SDK, as actually touched on before. We had a previous version of this, which was called the ASP NET Core rendering SDK, this was released, I think that was like version nine of our platform, the XP XM and XP, allowing you to build headless sites for that platform using ASP NET Core. It kind of didn't get much love after this first released, but we know we've got a lot of partners and customers who want to build with.net so there's been a few of us petitioning internally to get an updated version of this built for XM cloud, and that's what we've been doing. So we've re released a new refactor of that SDK, and we're getting we're giving it a new name along the way. So we dropped the name rendering out of the SDK because it does more than that, for a start, but also it does signify that this is in new SDK. It's not just a new version. So there are some people who built on the old one. If you want to migrate to the new one, the path is pretty smooth, but there are a few steps you'll have to take to do it, and that's all documented on our documentation site. It is available today. It's currently in alpha release, so there's some features that we're still working on, but a lot of the main nuts and bolts you're going to be do using to build a CMS site. We're going to take a look at all that. We have an XM cloud starter kit available today as well. So anyone who's looked at XM cloud from the next js or Angular side, you may have seen what's called the foundation head repository in GitHub. That's the initial starter kit for the JavaScript apps. We have basically the exact same repository, but with an ASP NET Core head instead of a JavaScript head in there, all the surrounding elements are the same. It's just the actual application that's different. And both of those repositories are open source on GitHub. So we're really trying to get more into the open source scene. It's fantastic for the community.
It means that, you know, if you do run into an issue with the SDK, you can actually get the source code and see where that might be. You can open an issue against it. And another big one is we'd love to get contributions. So if it's a small fix and you feel confident to do that, please open it. VR, we'd love to get contributions from the community on this as well. So before I start to show code and we'll build some components using this, I want to talk a little bit about how this works under the hood. So XM cloud is a headless application. What that means is it's a SaaS platform, and there's lots of different application application application elements behind the scenes in there, but what you're going to do is, as developers using that platform, you're going to build a.net asp.net, core application, and you're going to deploy it to each of the regions you're working in. That might be something like Azure in a web application, in a web app there, and you may have multiple web apps across the different regions you're working in each of those web apps will make requests through to XM cloud, the XM cloud platform, and that's going to return the data back that it needs to render out the different experiences that your market. So what I want to do is kind of dig into one of those apps and XM cloud and kind of show how that data moves between the two and how it's processed. And that should hopefully give us a good basis before we start to power up Visual Studio and start to look at some code. So in XM cloud, on the right, in the red box, we have all of our editing interfaces, and this is what I mean when I say we have a bunch of different applications within XM cloud, there's more than I'm showing here as well. I'm just going to go in over the basics. Here we have our Sites Manager, which is where, if you have a multi site instance, you can configure all those different sites. We have our page builder, which is where you can configure the pages that are rendered within those sites. And we also have a component builder, which is what you use to build out of the box kind of marketing control, components, really simple content, ones that you don't need so your marketing team will come along, and they'll interact with each of those different applications, and they'll craft these different experiences that they want to deliver to their end users. They hit the publish button, and all of that is cached in what's called experience edge. And this is our globally scaled edge delivery platform, and that means that all that data they've created basically gets converted down into JSON at the end of the day, and that's cached globally. So wherever you deploy your.net application, is there an available lightning fast to request. So then you, as the developer comes along and you build your ASP NET Core application, that's the blue box on the left we're looking at, and you install the.net SDK, and from there, you start to consume the data that's been cached out on edge. And there's a couple of different layers I want to touch on within the SDK. The first is the GraphQL client. So when you load up an app that's built with the SDK, you might, for example, go and request the slash news page or the slash news route.
What will happen here is the GraphQL client will make a layout request for that route to experience edge, and it will receive really big wall of JSON, basically describing all of the different components and all of the data that needs to be rendered out for that route you've requested. We then take that data, pass that all into strongly typed models. This being a.net app, that's kind of how we want to work. That's the thing we like about.net is having that type safety that we can rely on. We then take those models, pass them into our views, and the SDK provides a series of tag helpers designed to render out the data that's distorted into the different fields that have been created. CMS side and there's a couple of different views available, and we're going to look at both of these today. And the first is the model bar views. So this is kind of the type of view you're going to be using the majority of the time when you're building a site with XM cloud. It's really good for simple concept views. If you have something just like a title control, where you're pulling a single field from Sitecore. It could be something more complex, where you have, like a news article, where you may be pulling 567, 10 fields from Sitecore. But the key thing is, all the data's just come from Sitecore. It's not coming from any other systems. You're not having to add any logic in there to process the data afterwards. It's simply taking the data out of the CMS putting on the screen exactly as it was entered. If you're doing that kind of action, model bound views are really good to go with. Obviously, that's not going to cut it all the time, though, a lot of the time you need to have more complex logic included, and that's where a few components come in. So a few components, they're a standard they're a standard thing in ASP, NET Core, and they're really good for complex views, because it lets you basically control how the view is rendered and when the view action is called. And that means you can run C sharp code beforehand. That's really good if you're doing things like interacting with third party systems. That's a common one we're seeing for this and building headlessly. That's a really common action. For example, if you're building something like an E commerce site, you'll probably be pulling content out of the CMS, or you might want to pull product data out of a PMO from your E comm system, or something like that. In this scenario, view component is going to be really good, because you can still pull the content out of XM cloud. Well, then you can add your own C sharp code to reach out to. Third party system, and pull that data in, and we'll see that in action shortly. The last one is partial views. I included it here for completeness. Again, standard functionality in MVC. We're not going to dig too much into this today. Basically, it just allows you to create sub components. So if you're creating like carousel component, you may have each item in your carousel be a partial, just to keep your main carousel cleaner and to split out, split things out, logically, basically handy things to keep your code clean, but it's not something I'm going to dig too much into today. Okay, so I touched on tag helpers a little bit a minute ago.
These are really important when you're working with the SDK, it's one of the key pieces of functionality we have. If you look on the markup from a view on the right, you'll see what we have for a promo component provided out the box on the starter kit. And there's a lot of standard HTML in there, but you'll see there's a couple of tags which are the tag helpers, which are provided with the SDK, and they're the ones we start with SC dash so we have an SC dash image for rendering images, an SC dash text for rendering text, and an SC dash link for rendering links. And you can see we have the ASP for attribute on the where we're passing in a field from within the promo model that's defined at the top. This is used to basically render out an image field that's defined in the CMS, a text field from the CMS, and a link field the CMS. Now you might be asking, why don't we just use an inc tag, an ing tag, why don't we use a p tag? Why don't we use an inc the reason for that is support for editing functionality. So when I go and load this component into the Page Builder application, if I've used an SC image tag helper here, it will enable that image to be content managed. So your marketer can come along, they can then go and change that image with something else out of your media library. They can go and over type the text in the SC text Tag Helper. They can change the SC link tag helper to link to any other location they want to, and we have support for all the different field types in Sitecore. You can see all the list on the left hand side here. Okay, so I touched on the fact that this is an alpha release, and there are some features that we're still working on. So I definitely want to cover that first The first one is metadata editing. So I finished building this out a couple of weeks ago. It's still in PR. As I mentioned, the SDK is all open source. So if you go to the SDK, I'll show you the links to both those at the end, you can go and check out the PR and see what's been built and see what process it's in. For those of you that don't know, metadata editing is a really cool function, piece of functionality that lets the Page Builder connect down to a local developer instance, running your head application, embedded personalization. These are kind of the two big ones that are getting worked on currently. That's in process, in progress. Currently. I should have mentioned before, it's myself and Ivan leakings who are building this out, and he's in the process of building out the embedded personalization piece, component support. So we don't currently have component support. I mentioned before that components is the application that allows marketers to build really simple content components we currently have that in the backlog. Form support as well, and also deploy app support. So you can deploy all this yourself. But if you go into the deploy app and create a new project, if you're using next year Angular, you could use it. It's basically inbuilt in there, so you can go and just click that, click, OK, and it'll go and provision your repo. It'll provision an editing host for you. All of this kind of niceness. This is being built out by the deploy team themselves. Is in their backlog, so you can still do all the same things you can with ASP, NET Core. It's just a bit manual. You've got to go and clone the template repository yourself. You've then got to use your Bring Your Own, bring your own repository flow instead of using the standard template. Also when it comes to editing hosts, we currently only support JavaScript or NPM based editing hosts in XM cloud.
I'll basically host them ourselves. So what you need to do to enable it for marketers is to use what's called an external editing host. So if you're hosting your main app in Azure, all you'll most likely do is stand up an extra instance in Azure and point pages to that, so it'll load the external instance instead of one loaded on our hard disk or on our infrastructure. Okay, so that's enough with slides. Um, let's go and take a look at some of this in action. I'm going to hop over to GitHub first. And this is the XM cloud starter kit that I talked about, the.net starter kit. So this is basically everything you need to get started building with ASP NET Core. And. XM cloud. It is an ASP NET Core application. It has the SDK pre installed, and it has a bunch of sample components for you out of the box, this is a template repository in GitHub, for those of you that don't know. What that means is you can click here, and then you can click create new repository, and it'll create a duplicate of it wherever you want. To click the owner and then give it a name, we do this instead of forking, because what it allows to then do is change the visibility of this. So if we didn't have this and only had it as forks because it's an open source repository, it'd mean that every customer's code base for X and cloud is open source as well. And we obviously don't want that, so you go and use the template repository creation instead. I did a bit of this setup ahead of time to basically save us a bit of time today, and I've already done that. So this is my ASP, NET Core getting started. You can see I created it about three days ago when I was building out this presentation. And this is basically a repo that's based on that template repository. You can see I added a couple more commits in here. What I've done here is I've actually built a local version of the SDK, which includes that pages, metadata support I was talking about before, because it means we can leverage that through the demo today, and I'll talk about where that's a little different. Okay, I think Next up, we'll take a look in Visual Studio. So this is the ASP NET Core starter running in Visual Studio. Well, loaded into Visual Studio. I've loaded up the application here, and you can see it's a pretty standard.net Core application. We have our program CS, where everything's configured. Take a quick look in here. You can see this is where we load in things like our middleware. So you can see we're adding things like our GraphQL handler, the layout service, pages service. This is what's related to the pages, metadata, stuff I was talking about before. All this is documented. Both, we have auto generated documentation on the SDK. We also have good documentation on our main.co.com site as well. Now what I need to do first, I need to get my local application running, pointing to my instance of pages, because I want to get my data from there and run it locally. So to do that, we need to set up our app settings. If I load this up, you can see we have a bunch of properties in here. We need to set we need to set the context ID, and that's going to tell my application, basically tell the SDK which environment in XM cloud to pull the data from. We then need a site name, so which site Am I loading, because we're multi site platforms, we need to choose which one we're going to load up and an editing secret, and that basically allows pages to connect back and be used for editing processes, so we could enter our data straight into here.
That's not good practice. What we're going to do is we're going to first of all go and create a doc development version of this settings, because that's excluded automatically in the Git ignore and it means we're not actually accidentally going to commit any secrets and push those into our Git repository and have a leak out by mistake. I've got my development well loaded here. Now you might be wondering where we get this data from. Well, we get that from our deploy app. So I've got that loaded up here for anyone who hasn't loaded the XM or hasn't seen XM cloud before. This is basically where you configure all your deployments from. You see we have a bunch of projects already created here. I created this ASP, NET Core, Getting Started projects ahead of time again, just to save a bit of time provisioning all of this. And we have a single testing environment we're going to be working with today. When you go into that, you can see we have this developer settings section, and this is where you get everything you need to connect your local app. Now, I touched on before the fact that we don't have native support in deploy for ASP NET Core yet, and it becomes like kind of obvious in screens like this. This is all very NPM specific. You know, you can go and copy this and paste it directly into a dot env file, and your node pattern, your node project, and it'll work. We're working on getting basically a language lecture in here so that it'll change over, and it'll give you in JSON formats, vlsi.net, but for now, we just have to copy the individual properties over. I'm going to copy my context ID, and we'll paste that in. Copy My site name and the editing secret, and that's all this. I can save this. I'm going to hit f5 and then that's going to go away and build the application. See this happening in our output window below. So as I said, it's built using a local version of the SDK. In this case, because I wanted to make use of that metadata editing functionality, it's brought up a console window. I'll bring that over so you can see it, and it'll pop up a browser for us straight away. And you can see it's running on localhost, five. 1000 at one, and this is going to go over and it's going to connect to XM cloud. And you can see, I provisioned an instance of the skate park website ahead of time. This is a sample website you get out the box with XM cloud, and it's a pretty simple example site, giving you a few components so you can see how a site might look once it's provisioned. If you're building a site from scratch, you wouldn't use the skate park template site. You'd use the empty site. But for demos like this, it's really helpful. So we can move that out of the way. And what I'm going to do is I'm going to hop back to my original browser. The reason for that is, when you run it via five Visual Studio, kind of ties to that browser. And when I stop it and start it, as we go through, it'll open and close our browser over and over, and I want to keep a persistent window opening so we've got my testing environment loaded here. What I'm going to do is I'm going to go open the dashboard, and that'll connect me into the environment itself, and it takes us into the sites application. And you can see here we have one site that's been created already, called the skate park. I'm going to click and load that up, and it takes us into the new analytics dashboard for that site. Obviously, we're not going to see any data here. I only created this, I think yesterday morning. There hasn't been any traffic to it. But once your site's live, this is where you're going to learn all the data about how your site's been leveraged. So you get all the data about the analytics being used, the AB test, and then any tasks and localization information like what I want to do today is use the button in the top right and load up the page builder. Though, what this is going to do is going to load up pages, and it's going to try and connect to this site. And first of all, we're going to get an error, and that is because we don't have an editing host to find this is what I talked about before, about the fact that we don't have support for.net editing host yet. What you need to do is you need to go and configure an external editing host which will allow your marketers to load this up and do their marketing activities. Again. All that's documented on our doc site, but what we could do today is to start to use this metavaid Metadata editing which is defined in here.
It allows us to go and connect to a local so I can go HTTPS post, 1001 hit save, and this is now going to go and connect to that local app that I had running, and it's going to pull it directly into pages. And you can see here, now I get the editing kind of Chromes around it that'll allow me to go and over type text if I want. I can go and change the image over here, and this is what I was talking about with the tag helpers. So if I hadn't rendered these components out with Tag helpers, if they hadn't been rendered with that, you wouldn't get this editing interface ability. Basically, you can see here these aren't these are controlled differently, so you can't edit them, whereas over here you can actually go and edit all of this text. Inc, the thing I want to call out here is just how quickly we got this other money. When I started and loaded Visual Studio, I previously cleaned it back to an empty repo, so it's as if I just checked it out, and we've gone from basically having a clean checkout to a running local application, ready to do development on, also connected into the Page Builder experience in I mean, I took about three or four minutes maybe, and along with me talking a little bit along the way as well. So it's a super fast dev cycle. Now, you can go from checking out your repository to being a productive developer in a matter of minutes. It's really, really fast and channel moving right now. Okay, so developers need to build things. We need to go and build some components. So what I'm going to do first is I'm going to this is using this text component up here. I don't really like that. I'm going to change it. I'm going to build a new component. I'm going to build a component which has kind of a h1 tag in there for a title and and some text you can have below, like a title and text component. So yeah, we're going to go, we're going to go and do that. We're going to build a new component. Um, so to do that, I'm going to use this menu in the top left. And first of all, we're going to go to the Content Editor. For this environment, there's less and less need to drop back to the Content Editor. For those of you who've come from XM and XP, this is going to be very familiar, but this is basically the old interface we have from the platform the XP, and we're moving further and further away from having to use it. One of the places you do still have to use it is when provisioning new components, and that's what we're going to do now. So what I'm going to do is I'm going to load up the feature module here, and this is where all of the rendering definitions are, where all your components are defined, and I'm going to go to my rich text component. And when you're creating a component, we do recommend to use the clone rendering script, and that's because there's more items than just this item definition that are required for a component as template items, as data source items, as parameter items. So when you use the clone Rendering window like this, you get all those created for you much easier in creating yourself. So can I give it a name text, and this is only going to be available from. My site, so I'm going to move in and put it in this skate park project layer. Go to the Parameters tab. We're going to create a copy of the original parameters.
We don't want to reference them, and that allows me to change them just for this component. Same for the data source. That also means, if I change the rich text components data source, which, if we left it as inheritance, would also update for this one. I want to break that link and this will complete and create it all pretty quickly. There we go. So if we look in our project Renderings folder, here we have our title and text component. The component name has been set to title and text. That's really important. We'll come back to that once we get to the code section in a minute, but you need to basically make note of that name. And then if we scroll down to the editor options, you can see it's created a new title and text parameters template, and it's created a data source template. I'll call it text for some reason. We'll update that in a second. So I'm going to go and change my templates, because I want to create my title and text on Item looking in here. Let's create this text one. First of all, let's rename that to match, so we'll call it tiny typing, title and text. And we'll use the section the same can actually spaces in there. And then I want to add a title field, which will be a single line text. I think what I'll do as well save that first. I'm also going to rearrange the order of these. I think I'll move the title to be above the text that needs to make more sense to me. And there we go. We have our component defined, and we have it ready to use. What we need to do, finally, is to enable it for my site. So I'm going to go into my skate park site that was created. I'm going to go into my available renderings. And that's this is basically how you define which renderings are available for which sites, because some will only be specific. Some, if you're in a multi site environment, we have this page content section, and I'm just going to drop it in here for now. In reality, I might create a new section if I was working properly, but this will work for today's demo. I'm going to go and add in our new title and text. We'll save that, and basically, we now have everything ready to be able to go and use within our site. I'm going to go back to the page builder, and I'm going to refresh this page because we've added a new component. So we need to load those loads of component changes in. Now if we use this little tab here, this is how you can see what components are available. If we scroll down to the bottom, you can see they're grouped by the folder structure they're in, and we have our title and text component, but you'll notice it's grayed out. If I hover on it, it gives us a little error, saying your title and text is not implemented for the current editing host. Please contact your administrator, and that's really good, because that means it stops people from being able to add components to sites where they're not implemented yet. Maybe someone mistakenly adds a component to available rendering section for a site where that component doesn't exist. This is a bit of a build and braces approach to stop that. Well, basically stop a Content Editor mistakenly adding it to the page and then causing an error. So he's saying we haven't implemented the component because we haven't implemented the component. So that's what we need to do next. So if we hop back over to Visual Studio, the first thing I'm going to do is I'm going to create a model which represents that template I just created with the title and the text fields. So let's go and add a new class in here. Call it my title is correct title and text. Okay, and we'll stop the app running in the background. It's gonna need to rebuild it. What I'm gonna do is, I'm just gonna paste in some code that I have for this already. What we've done here is we've been inherited from a base model. The base model is defined as part of the starter kit. I'm gonna take a look in there. This basically has a load of pages specific fields in that so things like the component name. You can also define grid parameters to be able to define how it's rendered on the page.
You can do inline styling if there's any dynamic placeholders defined in there, inheriting from this base model that comes as part of the SDK gives you all that outlet box, and it lets us keep our component models pretty clean. We then defined our two fields. So we have our title field, which is a text field, because a single line text, and then we have our text field, which is a rich text field. And these are field types which come out of the SDK. You'll notice we also have attributes defined on these, and these are both set to site core component field. Because those attributes basically help the SDK know where in that big wall of JSON that comes out of experience edge to get this specific fields value from. So that's how it knows how to wire all that up. Okay, so we've got a model you can save that. The next thing we need to do is to actually create a view to show, not to actually define how this is all going to be rendered out. What we're going to be doing here is a model bound view, a really simple controller. All the data is coming out of Sitecore. So all of your model bound views, they all exist in these views, shared components, Sitecore, components, field folder, and these are the components that you get out of the box. So when I showed that components list in page builder, before anyone who would have looked through it would have seen row splitter, Rich Text promo, all of these are the ones that are defined in the starter kit provided out the box when you first load a clean except for instance. So now we're going to go and create a new view. We'll just create an empty razor view, and again, we're going to call it title text. Once more, I'm just going to paste the content in so you can see we have our model defined. So this is the title and text model we just created. And it's a really it's just a clean model. It's a dumb poco that's been dropped in you don't have to wrap it in generics to obscure any functionality the SDK is doing. We're just using out of the box core ASP NET core functionality. We're not kind of bending it in any weird or wonderful site core way. So anyone who's used ASP NET Core before this is all gonna be really familiar. We have a some component wrapper HTML here, and you can see this is where we're using things like the model styles from the base model, the good parameters, the ID. And this is all just helpful for the page builders to be able to render this out correctly. You can see we also have our tag builder used in a slightly different way here. Here we're defining a standard HTML h1, tag. But what you could do is, as long as you use the ASP net for attribute in here, you can actually make standard H, standard HTML tags run using the Tag Helper functionality, which is exactly what we want to use for our text field here, using our model dot, title, let's not, let's not do that, then below we have an SC text, which is what's going to be used for our rich text field. The text field, okay, so we can save that. Now, at this point, we've created our view. We've created our model. What we need to do, though, is we need to register that. We need to tell Sitecore and the SDK, how to leverage that and basically wire it up to that rendering definition in the CMS, remember I said the title and text field that was important. We need to make use of that. To do that, we have a Series Collection extension method in here. And basically what we're doing in here is this is called in our program, CS, the Add starter kit views. And we're in here we where we bind up all the views created. So we're going to add another model, model bound view. We will use the title and text model that we just created, paste the sayings. It's called the same and basically, at this point, what we're saying is the title and text component is defined in the CMS will be rendered as a model bound view.
It'll use the view the name needs to match, and then it'll use the same model. And that's everything we need to do. So we can now hit our five again. It'll rebuild the application and reload it up. We'll see the browser pop up and it'll bring the site up for us again. And here's the site. You notice? You'll notice our component isn't being used yet, because we've not actually loaded it onto the page yet. That's what we need to do. Let's hop back over to our page builder. The components still grayed out because we haven't refreshed anything yet here. So we need to reload the page, because that's at the point where it checks which components were available. So now the site's loaded up again. It's connected back to my local developer instance. I can go down now, and I can see that my title and text components are no longer grayed out. So I'm going to remove this text component. I don't really like that, and I'm going to drag my title and text component instead, and we're going to drop this just above, and it's going to take a little minute while it loads everything in. And here you can see it knows that there are two fields rendered with Tag helpers, but there's no actual data for them yet again, because we've used the Tag Helper functionality, this enables the CMS WYSIWYG editing functionality so I can go into here and I can say Hello, boss with an A goes and it. Sure spell it right, and then I can type in here and go, this is the best. Is awful today. And pages will automatically save this. So as I type this, contents automatically saved back, created into a data source item for me. And we can see this is now being created, added, and we've basically gone through the dev process of creating a really simple, you know, two field model bound view for for using the site. Super easy. Okay, so that's a nice, simple example. I want to build something a little more complex, though, this is a cool skate park. People are going to come and visit it. What I want to include down here is, I think I want to include maybe, like, a live weather report. So if anyone wants to come and use the skate park, they can check the weather ahead of time. And I think many people like skating in the rain, so it means that they can check whether it's a good now, I could go and create a model bound view, just like I did for this, I could create a load of fields for the current weather, and my marketer could go and update those fields every time the weather changes. But that sounds like a pretty awful job. No one wants to do that, and there's heaps of weather services out there that we can leverage. So what we're going to do instead is we're going to create a view component, and we're going to call an external Weather Service. And the one I've been using for a little bit is open weather map. So this is a really simple open source or open and available weather API. You basically there's a couple of different options. You can pass in a ladder along, there's no way you can pass in a city if you want, and an API key. And if we scroll down, you basically get a bit of JSON back, which defines what basically shows you what the weather currently is. And so it'll give you like smoke raining with moderate rain, and it'll give you some temperature data as well. So we're going to create a view component which has a little bit of data that comes out of site call and a little bit, and it's also going to call this external service as well. Okay, so let's go for it.
First of all, we're going to go back to the Content Editor. So again, this is going to be a new rendering. So we need to go back, and we need to follow that same process of cloning an existing this time, we're just going to go into the title and text one. We just created a more clone that one instead, going to bring up the same modal dialog we had, and this time, we'll call it weather. It's just for this site, so we'll keep it in the skate park module, and then we'll make a copy of the parameters, and we'll make a copy of the data source I'm okay, and you can see the weather compose been created, and it's given us our weather name again. Let's go down and we're going to go and edit our templates once more. Now this time, what we're going to do is we're going to have that text data coming out of the weather service, but I think I'm going to add an image to go alongside it, because that can make it a bit more of a rich component, make it a little bit more engaging. So gonna get rid of the text component. We'll add an image field in here. We'll make it an image field, and then we'll give it the section name, weather. So do things properly, and you can see our templates now updated, and we have an image field on there instead. The last thing we need to do is to go and update our available renderings once more. And you can start to see that we end up going through this flow of how we create the components, enable them, and then build them. And it's kind of a little bit of a repetitive flow. This is basically what you're doing day to day as a developer working with XM cloud and ASP NET Core. So we've got the component definition created. Now we've got the available in our renderings. We can go back to the page builder, you can refresh this, and then we hopefully should see it in our components, but again, grayed out because we haven't actually built anything yet. So let's go back to our component listing while the page is loading, and you can see awesome, exactly where we want to be. It says the components defined in the CMS, but our rendering host doesn't have it our editing host doesn't have it enabled. So let's get this out of the way and go back to Visual Studio. Let's build our weather component. So I'm going to stop this once more, because we're going to be building code, and this time, ahead of time, I actually went and created the models for us, just out of the way. There's a few other things we needed in here. Now we have our weather model in here. And to keep this easier, I've just basically dropped all of our classes needed into one file. I wouldn't do that really, but it makes things a little simpler. For the demo, you can see we've added our image field in here. You can see we have our site core component field defined. It's set. And this time I wanted to show it's possible to rename. Fields in the model as well. So I called it image in the CMS, if you remember. But because we've defined the name parameter here, it actually lets us change the property name in our model, so we can override it to the image field. That's handy if you want to name things slightly differently in your code compared to the CMS, which sometimes happens.
Then you'll see we have this data section here. This data section here is weather data class defined below in here, you can see we have coordinates, we have weather we have the main section, the city name, all of that is what's coming out of this JSON document here. So we have our coordinates, we have the weather piece, we have the main section, and the bottom, I think we name was the name of the actual city that we're looking at, which is Melbourne, where I'm based. And we don't need any other attributes on here. I've added some below for the JSON property binding, because I'm just going to be using System text or JSON at this point when we're mapping this through what you can see, we end up with a model here which is provide comprised of data which is coming from multiple sources. We have a field from the CMS, and then we have multiple fields and properties which are coming from our third party service. Okay, so this time, I think we'll go and we'll create the view first this time. At this point, we're not creating a model bound view, so we don't need to put it in the cycle components folder here. So I'm going to put it directly, just in this general component section here, create an empty razor view again. Once more, we'll just call this weather, and I'll go and I will paste in the code for the model. And again, you can see we're just passing in our weather model here. Dumb poco, no generics, masking activity, nothing being hidden away by any weird and wonderful magic standard, asp.net, core functionality, you can see we're using the SC image tag helper, which will enable that image to be content editable. And then below, we're just outputting the data which is coming from our weather service. So we have the city name, we have the general weather description, and then below we have the temperature data, temperature now, what's the feels like? What's the max and min for the day coming? I think that's pretty good weather information for anyone who's looking to go and skate at our skate park. Okay, so we've got the model created. We've got the view created. Next thing we need to do is to figure out how we can go and call our external, third party service to pull in our extra data. This is where the view components functionality comes in. We don't have any view components in here yet, so I'm going to have to create a new folder for it. So we'll add a new folder and we'll call that view and then in here we will create the weather view component. Okay? Now I'm just going to start to paste some code in here, but I won't do the whole thing all at once, and I'll kind of talk to it as we go. First of all, I do the using that's pretty easy. And then what I'm going to do is I'm just going to add an inline constructor for this, and then we'll talk about what's going on. So view components in ASP NET Core all have to come from the Base View component class.
This is standard ASP NET Core and BC functionality really well documented on the Microsoft site. If you want to learn more about what view components are, you can go over there and read all about it. You'll notice we're also injecting the I view model binder. This comes out of the ASP, NET Core, SDK. This is the key piece of functionality that is responsible for taking that big wall of JSON that comes out from experience edge and binding it to objects so we could give it our model basically, that is defined with the image field defined on it, and the model view, the view model binder, will basically be able to go and take that wall of JSON, pick out the correct field to bind to that image in the model. So the next thing we'll do is we're just going to add a couple of fields into this class so we have an instance of the model binder that's passed in so we can reference it later on. We're also going to define a view component name, because we're going to have to use the name of this in multiple places. So we'll add it into a string to make sure we don't know who's spelling errors. We also have to decorate this class with the view component attribute, again, that's part of how ASP, net, core, NPC works, and we give it the name, view component name, which is defined in here. So we're basically defining whether next up we need to define how this is going to work and to run a view component. What you do is you implement the Invoke async if you want to run asynchronously or there's just a. Standard invoke if you want to read it synchronously, we're going to be doing a bunch of calls out. Well, single call out to external services. We're going to be doing the mold binding, and both of those are asynchronous calls. So so we're going to use the async method. So first of all, what we're going to do is we're going to do the CMS binding. The way I like to think of this is of this is, when does this code execute? So this code executes after the request to edge has already been made. So the request to edge has been made by the SDK. We've got the wall of JSON back from it, so we're not going to call edge when this happens. All we're going to do is process the existing response that's been made, and that existing response actually exists in the main view context. The view context is a property you get access to by inheriting from view component, and this is again standard ASP NET core functionality. But what you can do is you can use the model binder now.
So we basically access that model binder that was injected in using IOC. We basically tell it we want the weather model that we created to come back out. And we pass in the view context that contains all of the JSON back from edge. And what we do is we get an instance of our model back, which fingers crossed, should have our image field populated. What we next need to do, though, is populate that weather data which is coming out of our third party service. And to do that, we're just going to use a really standard HTTP client, and I've pasted my URL in here. Realistically, you'd probably put things like your API key into secret or something else. It's an open service, just a demo. So we're just going to paste it in there for now. And what we're going to do is we're going to go and call that service. So we basically await the calls to get async to the URL. We check the call was successful. We then get the JSON string from the response, and then we use standard system text JSON to basically pass it into a weather data object, which then gets assigned to the data property of them all, if you remember, the model itself had two properties on there. It was the image field from the CMS, and it was the quote, the object that contained all the weather data we're calling from our third party surface. Finally, we pass it all into our view. So the view we created before we pass the modeling, and then basically the result we get back from that is what's returned out of this invoke method. And that is basically how you can build a complex view component. The last thing we need to do is to actually go and register this once more, much in the same way as we did for our model bound view, but this time, we're going to register a view component instead. And to register a view component, all you need to do is pass it the string name, and that's the name that was used in the attribute that was assigned into the view component itself. So if you remember, before we had a string version of this, we can reference again, Inc, I spelled that correctly. Let's see. Oh, it is brilliant. Okay, and we can do value component dot view component name, and it's a nice way of just making sure that we update that down the track, we've only got a change in one place, okay? So we can hit a five once more. And let's try and see if this all works. So it's going to go and build my application once more. When that's finished, it's going to bring up a browser, and oh, we can see the title and text has changed because we've updated that in the CMS before. So my locally running version. It's changed. He's pulling down the updated CMS content. But the weather component isn't there yet because we haven't added it in pages. So let's go back to our page builder experience. I'm going to refresh the page again because I need to. I need pages to know that the weather component is now implemented. It's now available for us to use with this editing host. So here we can see the site's loaded. We can click over. We can see the weather components there. Let's just drag this. Let's do it at the top of it, just before the promo components. Just going to go and pull this in, and it's going to make that request over. And there we go. We can see it's now added in our data. So it's pulled in. It's saying it's Melbourne.
I can look out of my window and it is overcast clouds, overcast clouds, and it is 29 degrees. Not sure how warm it is near you, but it's 10 to nine in the morning. So it's like it's gonna be a warm day today. You can also see we have our image fuel menu. So here it is. It's available and ready to be able to be content managed. So we can go over here, and I could go and choose an image from here. I haven't uploaded one that's suitable. I'll let's choose an image of the original cycle lady we always used to see. We can see here how we've created a complex component which has a combination of data from both CMS and. And third party sources all pulled together by the head, making requests out to different sources, just like textbook headless development. Okay, so I just have one more slide for you guys, PowerPoint. So I was looking for you. I talked a bit about the SDK, talked a bit about the starter kit. You can access them both from these URLs. Those QR codes should take you there as well. We'd love to hear feedback, you know, if you using this Inc issues, we'd love to hear about issues, open issues on the repo. If you want to fix something or take off some work, we'd love to get PRs from the community. And I guess in the meantime, does anyone have any questions? I can't you on mute. Actually, that was a good, great presentation. Rob, thank you going after the last thing that you said about having issues like is, how do people report these, is it like, does sidecore support? Sitecore support? People do they recognize any issues that people are having with the core SDK? Yeah, yeah. So basically, it is managed by support as well as you can go through support portal, or if you know, if you know what the issue is, if you want to look in SDK, you can open an issue directly on the repo as well and me, and I don't get around to looking at it, yeah, nice. So we have a few questions, and this one is probably a common one. All of the hipsters use MacBooks because it's VS code, right? I'm assuming you could run VS code. Is it like, Have you played around with it and went on MacBook? Yeah. So the advantage to running fed first is what we call it, where basically you just run the head locally, and you connect view to edge, is there's no dependency on the Windows machine. So you can go and run it on Mac, on Linux, on anything you like. Yeah. You can run it anywhere. You can run the.net CLI, basically, nice. So the next question, is there any form of like helix or structured thing, whether it's for the next years projects or the asp.net core projects? So definitely not for next years. We recommend following the guidance for the language of choice, basically. So follow next year's best practice next years Angular best practice for Angular when it comes to.net Core. For those of you that don't know, helix was a set of guidance, basically architecture principles we introduced a few years ago for platform the XP, where everything was written in.net Core, and you had these huge.net core code bases you were creating when I showed the content tree before, and there was folders for foundation, feature and project. That was kind of the layering approach that helix introduced. That's why it's still in the CMS. It's kind of a bit of a hangover from there. Realistically, we kind of leave it up to yourselves. We're not prescribing helix. We don't say helix is mandatory. If you end up building an enormous.net code base, you should definitely follow some form of architecture principles, or it's going to get messy really, really quickly.
If you want to use helix, you can use helix. If you want to define an architecture principle that matters, well, that kind of fits better for your project. You could do that as well. Just don't put everything in one project. Just make a big mess, basically. Yeah, and this one is interesting, Rob, because, you know, with with next js, or any of the JS frameworks with vercel or Netlify, it's pretty smooth in terms of the CICD work, right? Like, can you tell us a little bit more in terms of, like, how it is to set this up with the DevOps and build and all of that, yeah? So as you said, with next js, everything's integrated, basically, and this kind of comes back to the point I said about not being negatively integrated into the deploy app. Yet we're working on that when we have support for.net editing hosts, basically everything from the CMS side will all be, all be automated. As soon as you do a commit, your editing host will be recreated. Currently, that's not the case. So you will need to handle deployment of your production instances, your delivery instances. You'll need to handle deployment of your editing your editing instances as well, because you have to host those externally. Majority of time people are probably going to be on Azure in a web app or something similar, we imagine. So how you handle that is kind of up to yourselves. Whether you still let the deploy out handle you can still let the player handle all of the non kind of.net Core instances, and then you handle the rest yourself. The other option would be to back, kind of take over everything yourself and manage everything using the.net CL, so using the XM cloud CLI to handle that as well. We have an example using that with GitHub actions on the XM cloud introduction repo. So if you want to see that, because we have the MVP site is built using this SDK as well. We host that in an Azure web app. And yeah, we own, we basically took over the CIC. Process entirely. For that, it's up to yourselves as options. Basically, things will become more integrated over time. But for now, it's a little manual. So the next question is, is it still recommended to use SXS scaffolding to create sites, or does the site sub do something similar? Oh, no. So through the sites app. So lot of sites open here, ah, so let's go back to sites. I know. So if you go through my make me log in again. Let's see. Oh no, here we go. Yeah. So you basically use the Create Site button, so it's all handled through the sites app now.
So you create a new site. I mentioned before, you have the NT or the basic site, the basics, the skatepark we just looked at, and you can add your own templates in here. So if you create multi site templates, yeah, then you basically give it a name. New Site number two, you choose which skate park. It adds the same collection as previously. It creates site, and away you go. That'll create the site in two or three minutes in the background. And then the other question I had while you were showing the creation of the fields and replicating the fields right? Like with the newer content editor, we're not going to have that ability. So is there something in pages that's going to let you do that? It's all coming. We're basically working to avoid, we're working to a state where you don't have to drop down to the Content Editor. Okay, that was kind of what I was saying about having to drop back. Yeah. We recently released the ability to edit non visual fields. So that was a new one recently, where previously, pages would only support like the field, just like title and text, you couldn't edit like your metadata fields which aren't actually display. That's been the read that was a reason to have to drop down to the Content Editor. We've changed that so you don't have to anymore. Component registration, things like that are another one we're working on. So we're just basically trying to tick them off one by one and get through to the point where we can where you don't need to go down to the Content Editor anymore. That's the end goal. Nice. Next question is, so we no longer need the dev tunnels with the metadata editing support correct. So currently I mentioned I built the SDK locally, which included metadata support that will be coming when it gets through PR we publish the new git packages. Currently with the SDK, you have to use a dev tunnel. So I bring up Visual Studio again. Let me try and remember how I do this. Now I'm thinking, oh yeah. So when you run it in here, you can set up a dev tool, which basically allows you to say, temporary and public. And then what that'll do is, when I run my application, now, if I run it again, it'll basically create an external URL that is accessible to my local machine. So you can then go in and configure the editing posts in Inc Sitecore to basically point through to this URL here, which Microsoft's generated for me. The disadvantage to this is you have to do it by configuring an item in cycle so you can only use one at a time, so only one developer can use that down to their developer machine, which is really clunky, yeah. So not fantastic. But when we get the metadata editing support published, then you have to do that anymore. Basically cool. So the next one is, are the changes required in the front end solution, starter kit for metadata editing support to work documented somewhere. So when we publish the SDK will get published, first with a new version, then I'll go and update the starter kit, SDK, and there's not much, really.
Basically, all it is, it'll be a new set of NuGet packages. There's a few things in the program, CS, so it's pages handler, pages adding support for the pages handler. There's a use Pages. Well, I use cycle pages when you're in editing mode. And then finally, there's some scripts that need to get injected in so on The View Layout maybe, yeah, so the tag here for the editing scripts, so basically, they're served by edge as well. So when you connect when, basically when metadata pages connects, Edge sends down a list of scripts that need to be loaded into the page that basically enable all of the metadata editing functionality. But, yeah, once we pull it police SDK changes static, it changes will follow really quickly, and then you'll be able to just to go and see the commit which has the changes in and replicate those in your app. Nice. Next question, any plans to integrate? I think you answered this that it's in the works, right? It is. It's in the backlog. So well, embedded personalization, it's actually been that's one that Ivan's working on now. So yeah, embedded personalization is metadata with the two big ones we wanted to get knocked off first. But yeah, hopefully not too long. And a serious question here, or nay on the Wonder bird. I diet ginger beer. I wouldn't go diet outside the original. Nice, Thanks, Rob. This was really, really helpful and exciting. You know, I'm starting the thing with Bala. So this is really, really exciting to see the old like dotnet stuff and everything coming to life, for sure. It's awesome, like, if anyone starts using it, and even if you've just got feedback about you know, you like some things you don't like things, definitely let us know. Keen to hear how people find it once they start building with it. Yeah, for sure. Thank you so much. If anyone else has any other questions, just post it on the thread and Oh, Marmite or Vegemite, is what cameras is asking. Oh, that's a tough question. As an Englishman now living in Australia, like I'm pretty tall, I don't think the missus would forgive me if I said Marmite. So I'll go Vegemite. I'll sell out my homeland. Have a good one, guys. Cheers. Thanks for having me. You.

Konabos Inc.
Yay to Konabosing in style! Content tagged with the Konabos handle is produced by two or more Konabos team members.