Building a CMS-Driven Website with Payload CMS, Next.js and Neon Postgres
Jose Raimondi - Front-End Developer
31 Mar 2025
In this post, we will walk through a simple but complete example of how to build a CMS-driven Next.js application using:
✅ Payload CMS as our headless CMS
✅ Next.js as our frontend framework
✅ Vercel Blob Storage to store images
✅ Neon as the Postgres database to persist data
✅ A small project structure with sample components
We’ll build a simple example site with:
• A Page Collection where editors can create pages, each with a unique path.
• Three sample components:
- Header
- Footer
- FeatureBoxHero
🟣 Database Setup (Neon)
1. Go to Neon and create a free Postgres database.
2. Once you create it, you'll get a connection string which you need to copy and save for later.
🟣 Payload CMS Setup
In your next js app, run the following commands:
npx create-payload-app my-cms
cd my-cmsConfigure Payload to use Neon:
In payload.config.ts
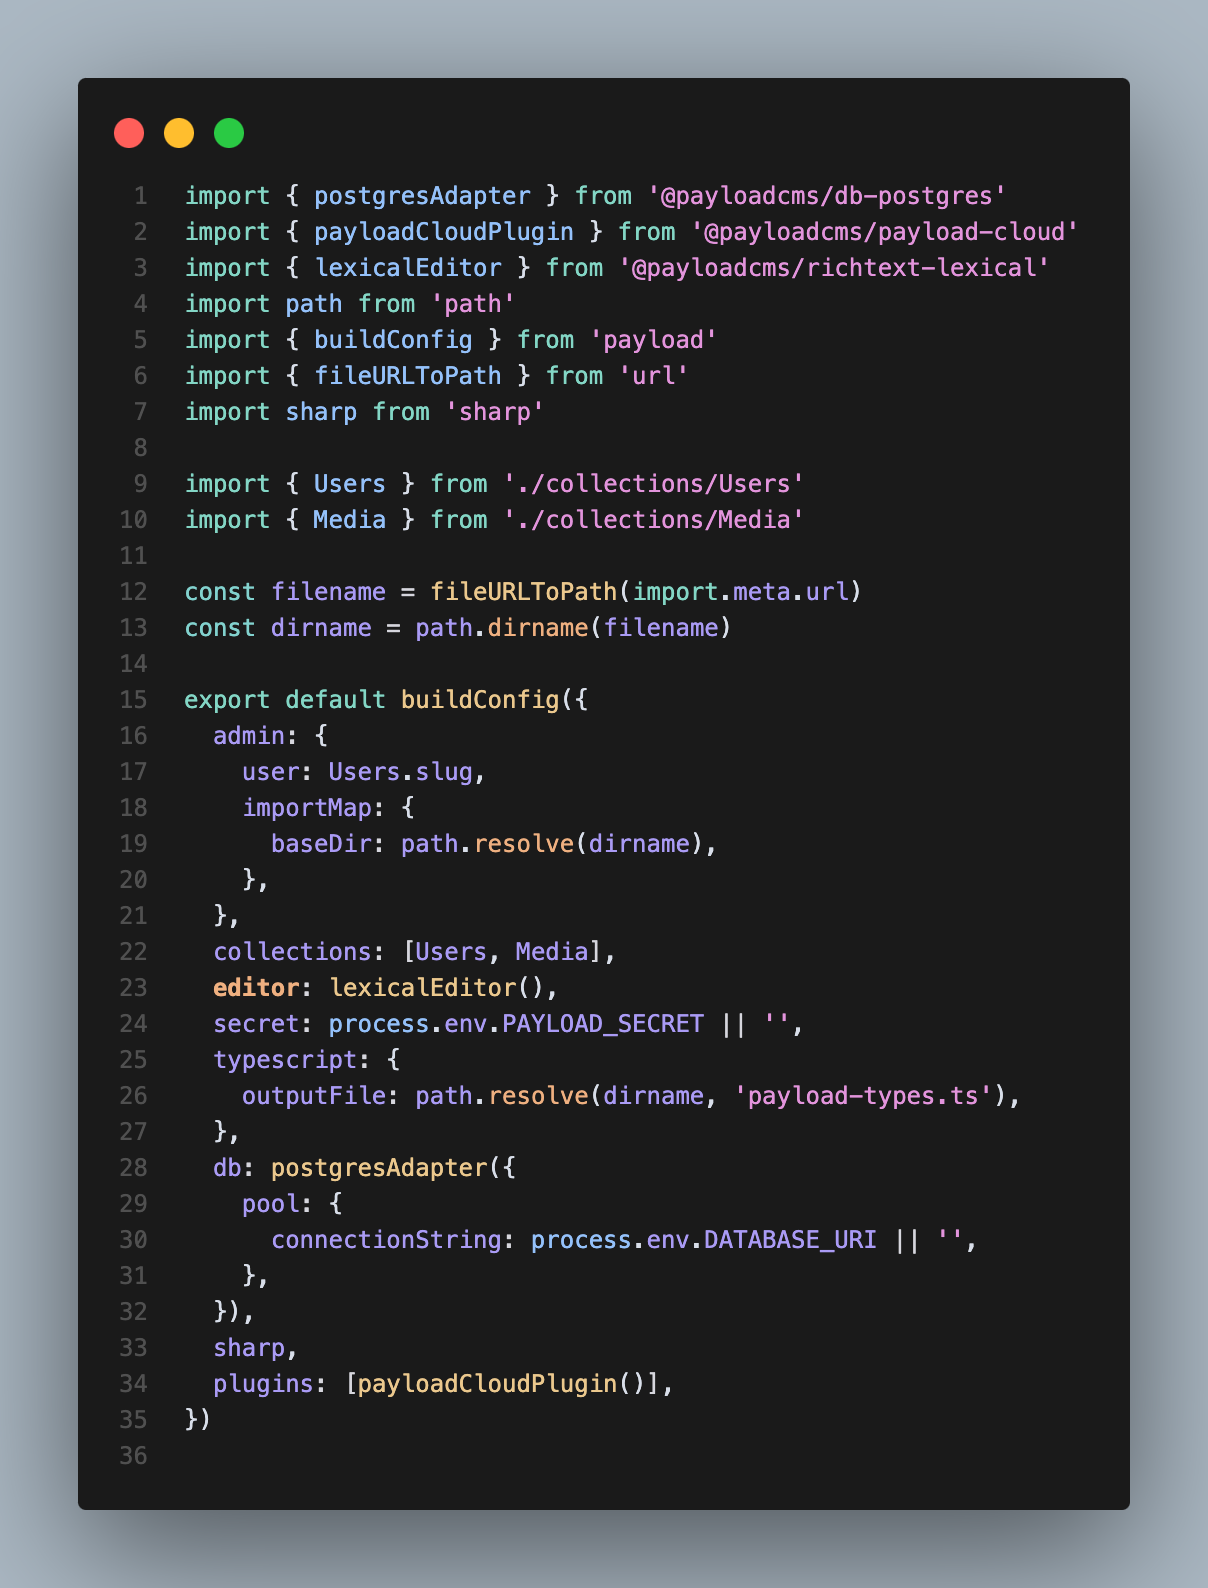
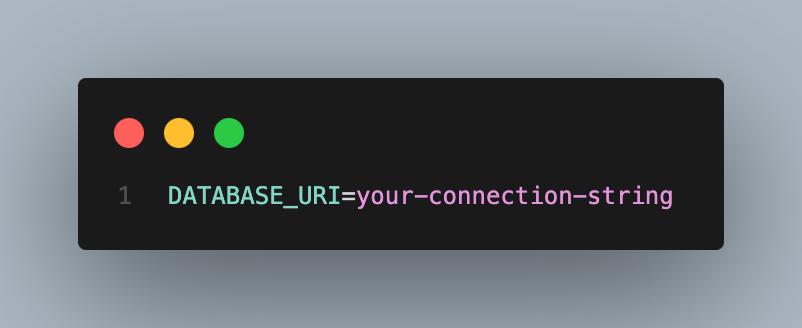
And add the following env:
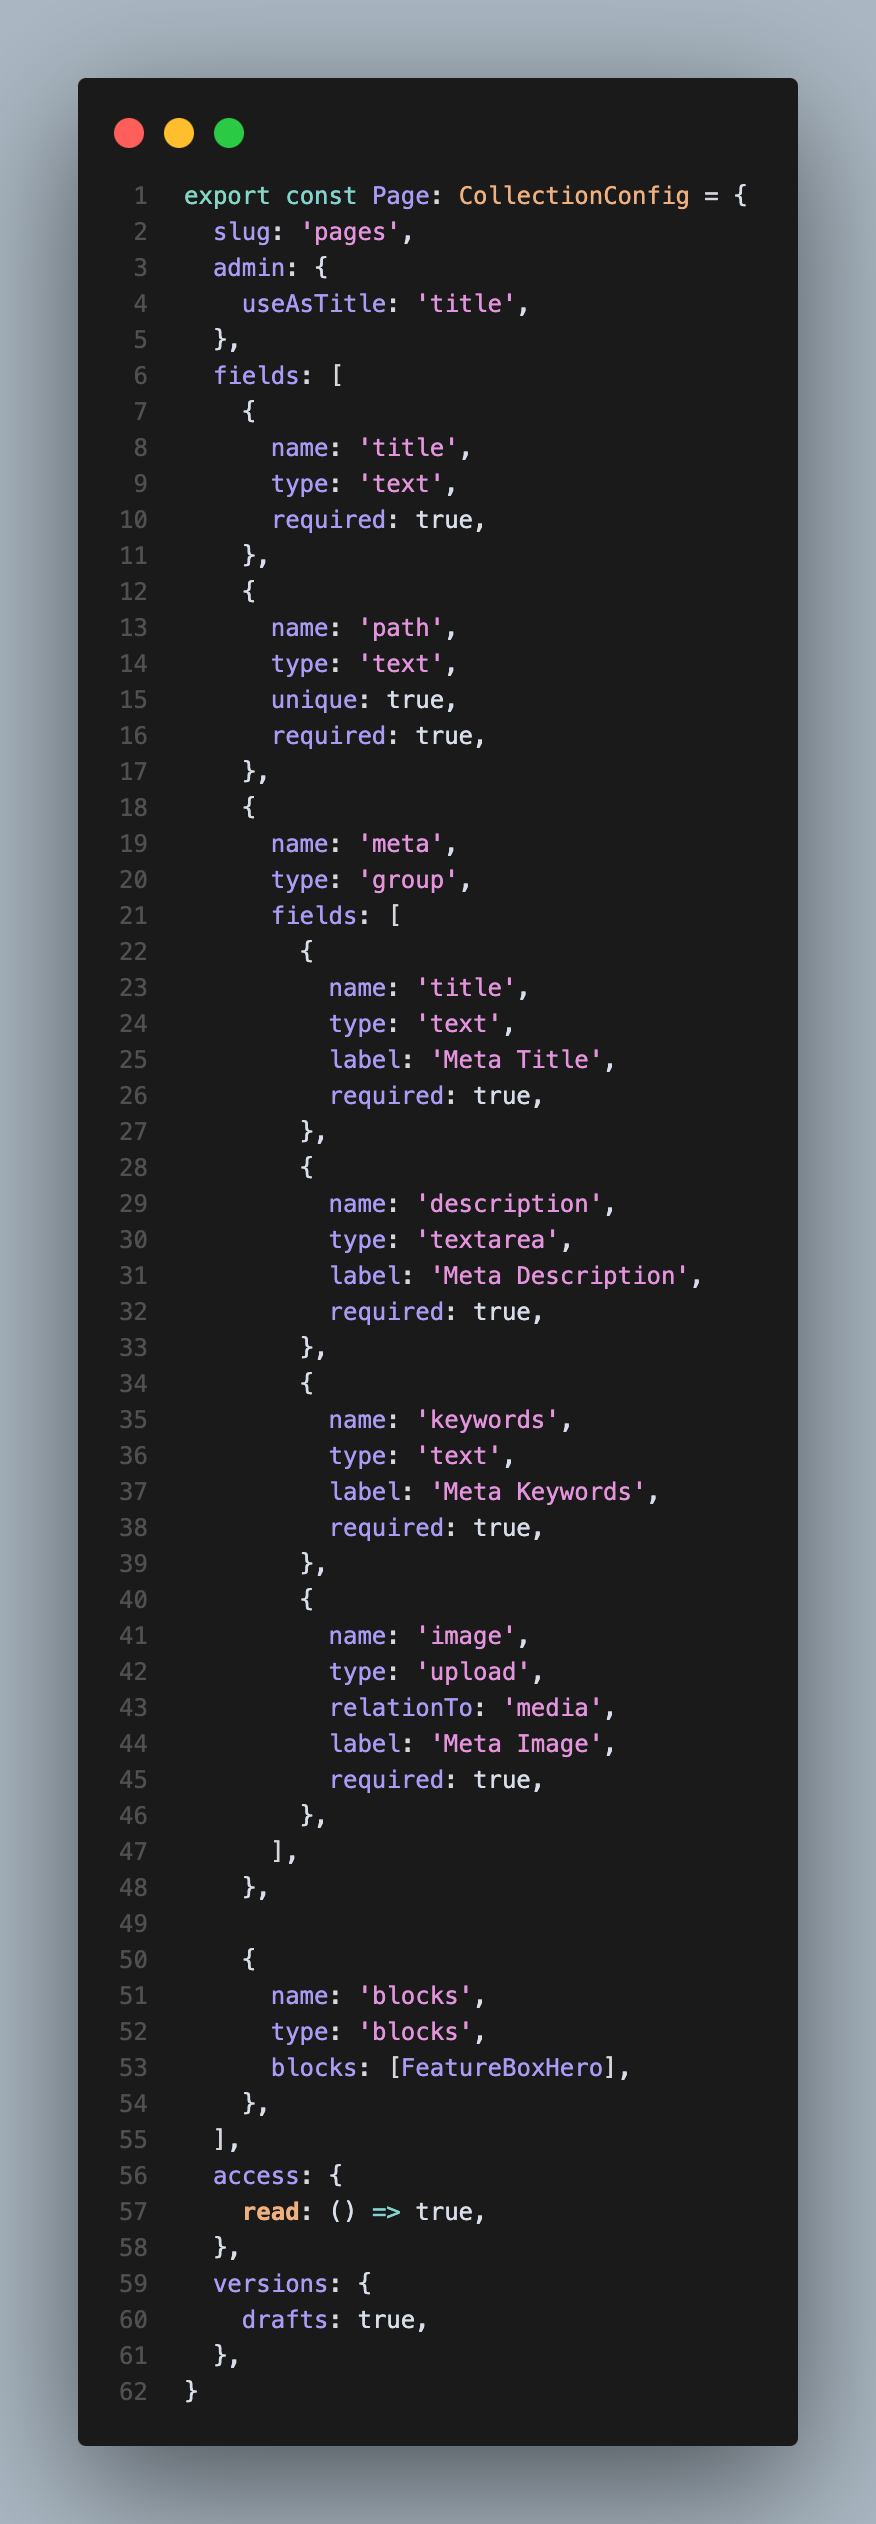
🟣 Page Collection Example
Create collections folder and add Pages.ts file
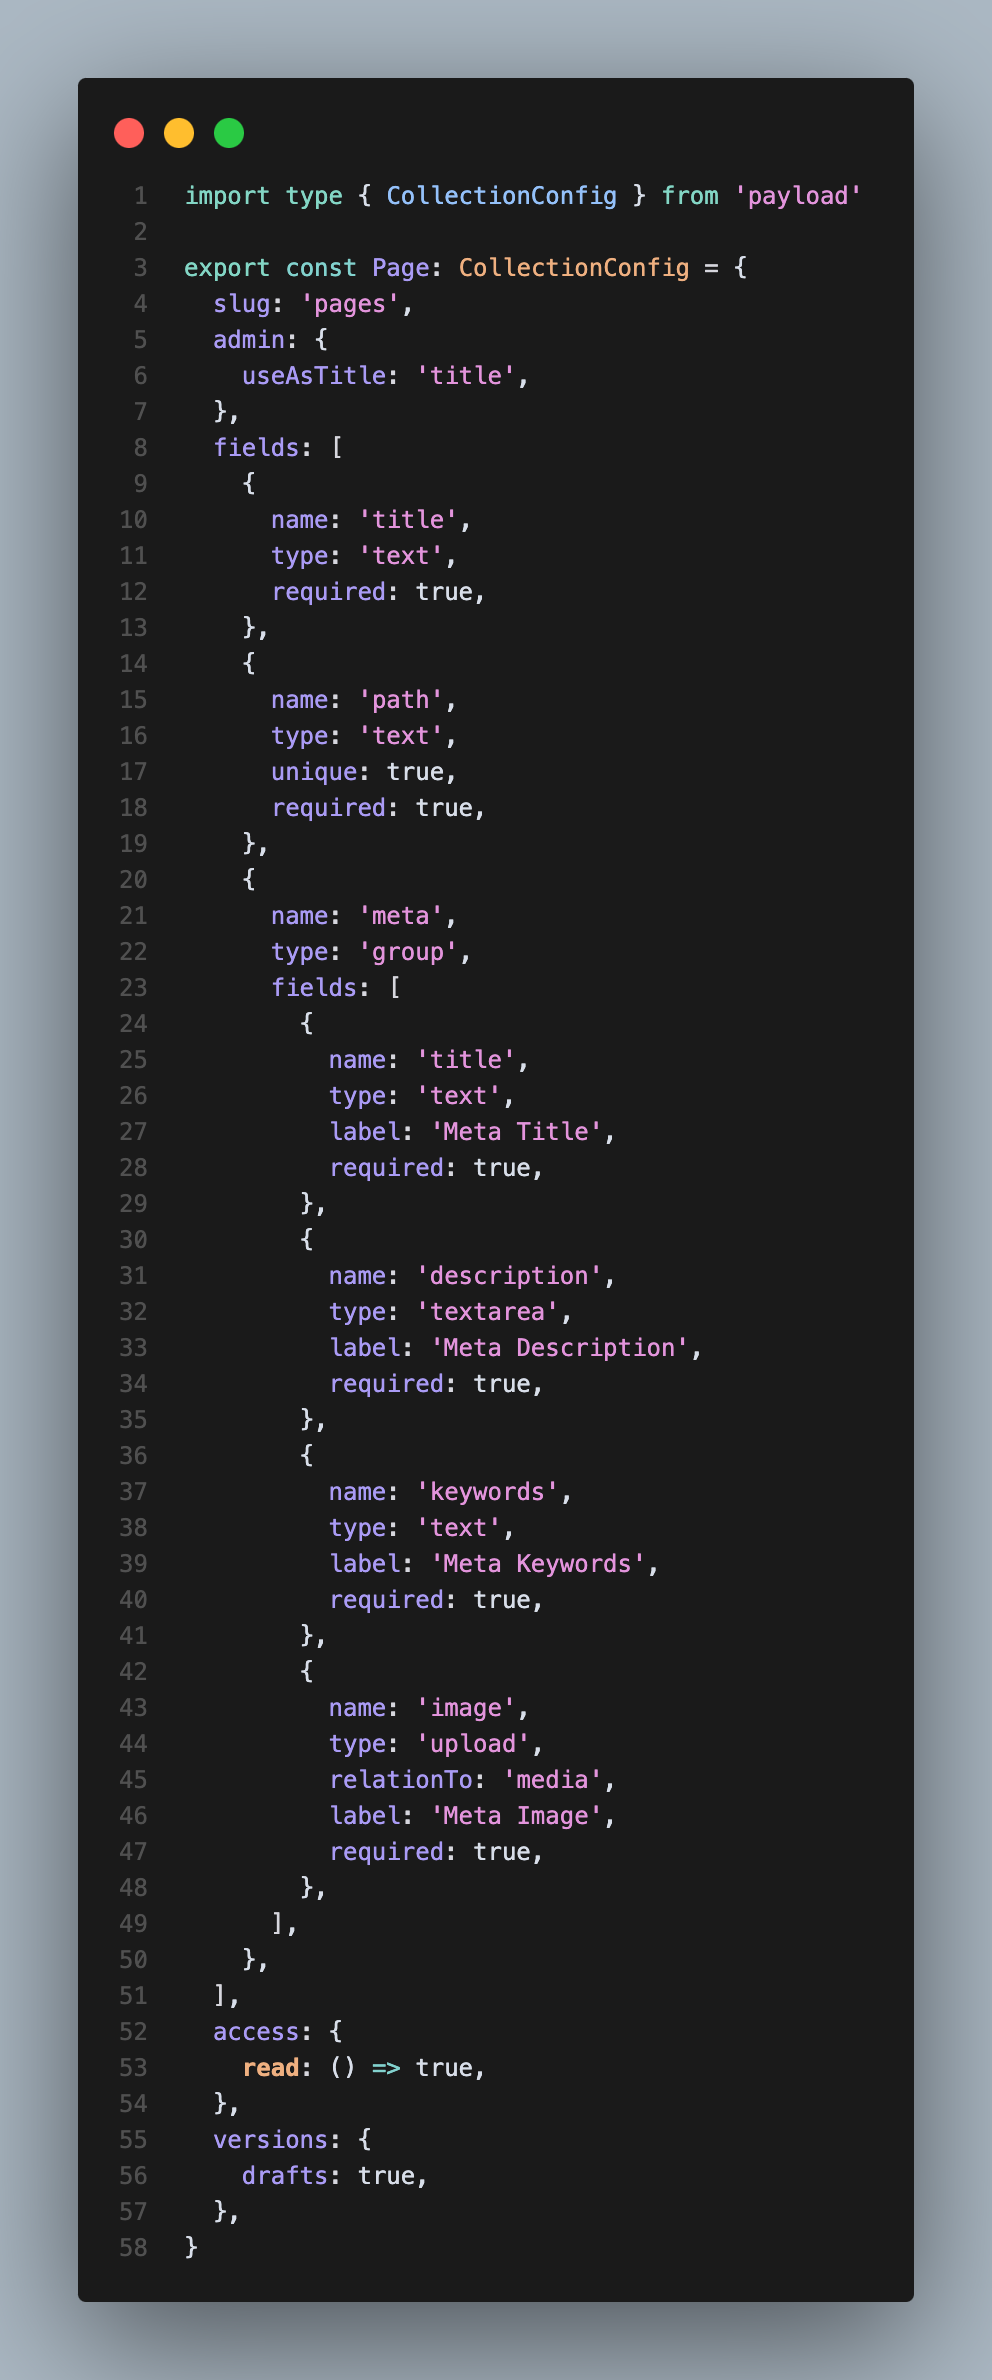
Collections are groups of records, called Documents, that all share a common schema. You can define as many Collections as your application needs. Each Document in a Collection is stored in the database based on the fields that you define.
🟣 Media Collection for Vercel Blob Storage
1. Install the Vercel Blob storage adapter:
pnpm install @payloadcms/plugin-cloud-storage
2. Update your payload's config plugin property:
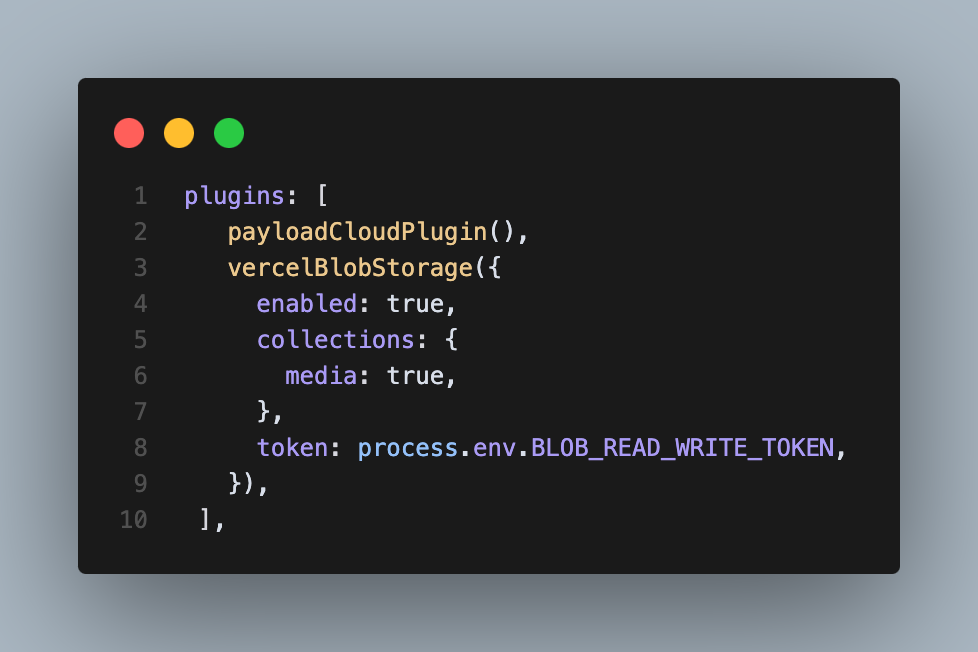
3. Add the BLOB_READ_WRITE_TOKEN env on your .env file. Here is more information about it.
🟣 Create Header and Footer collections:
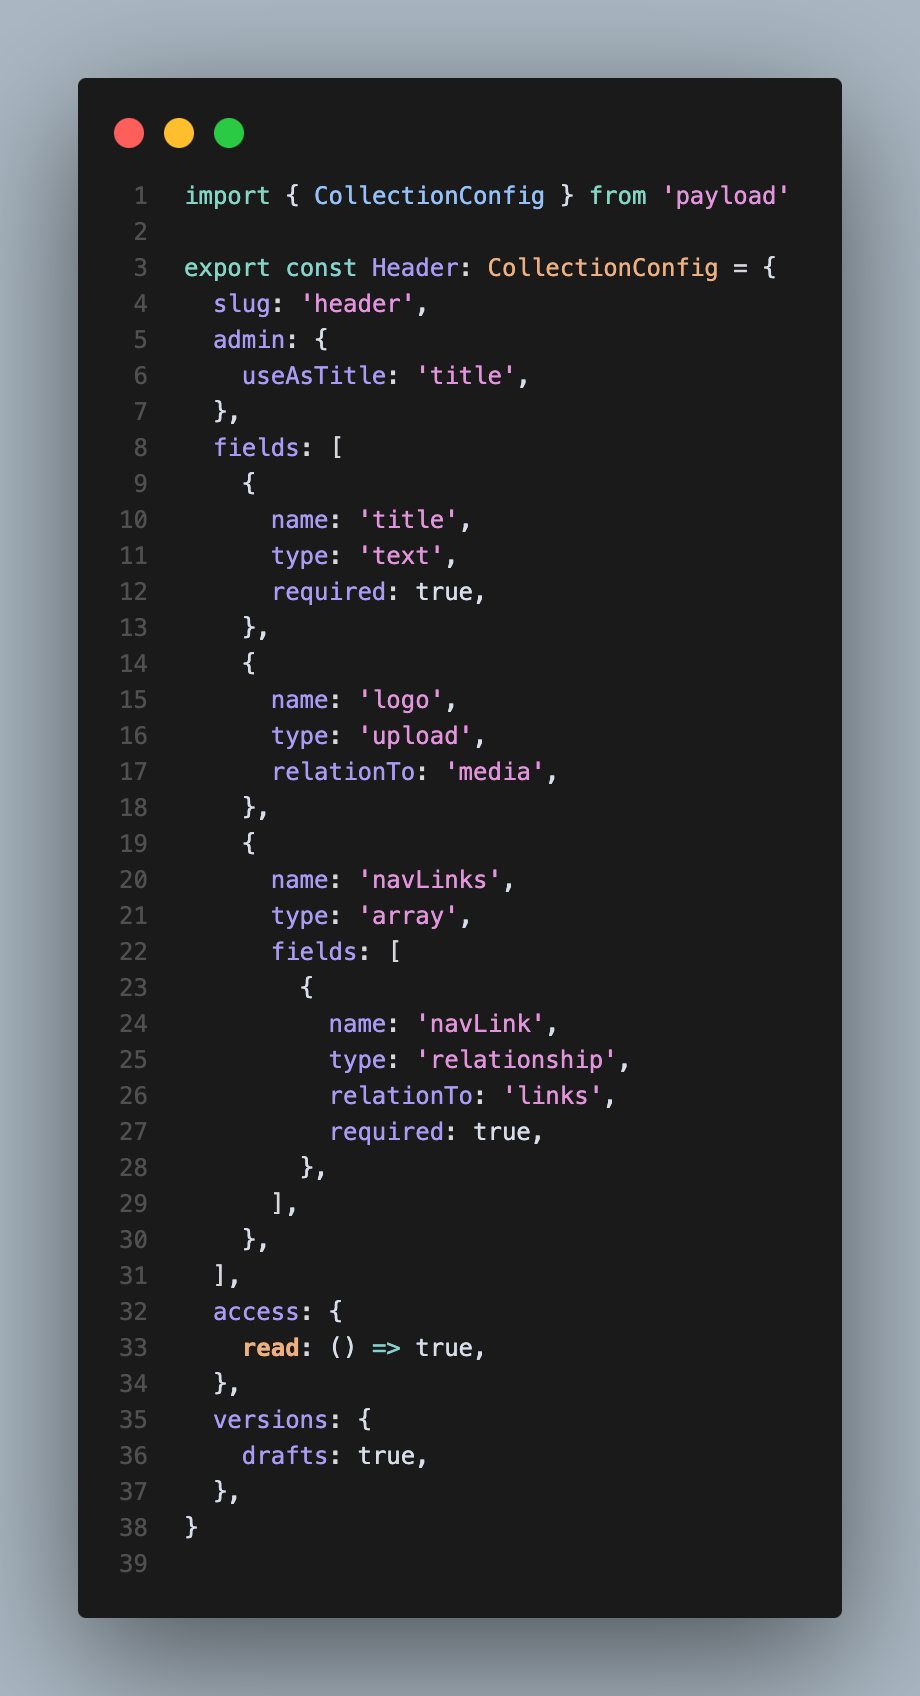
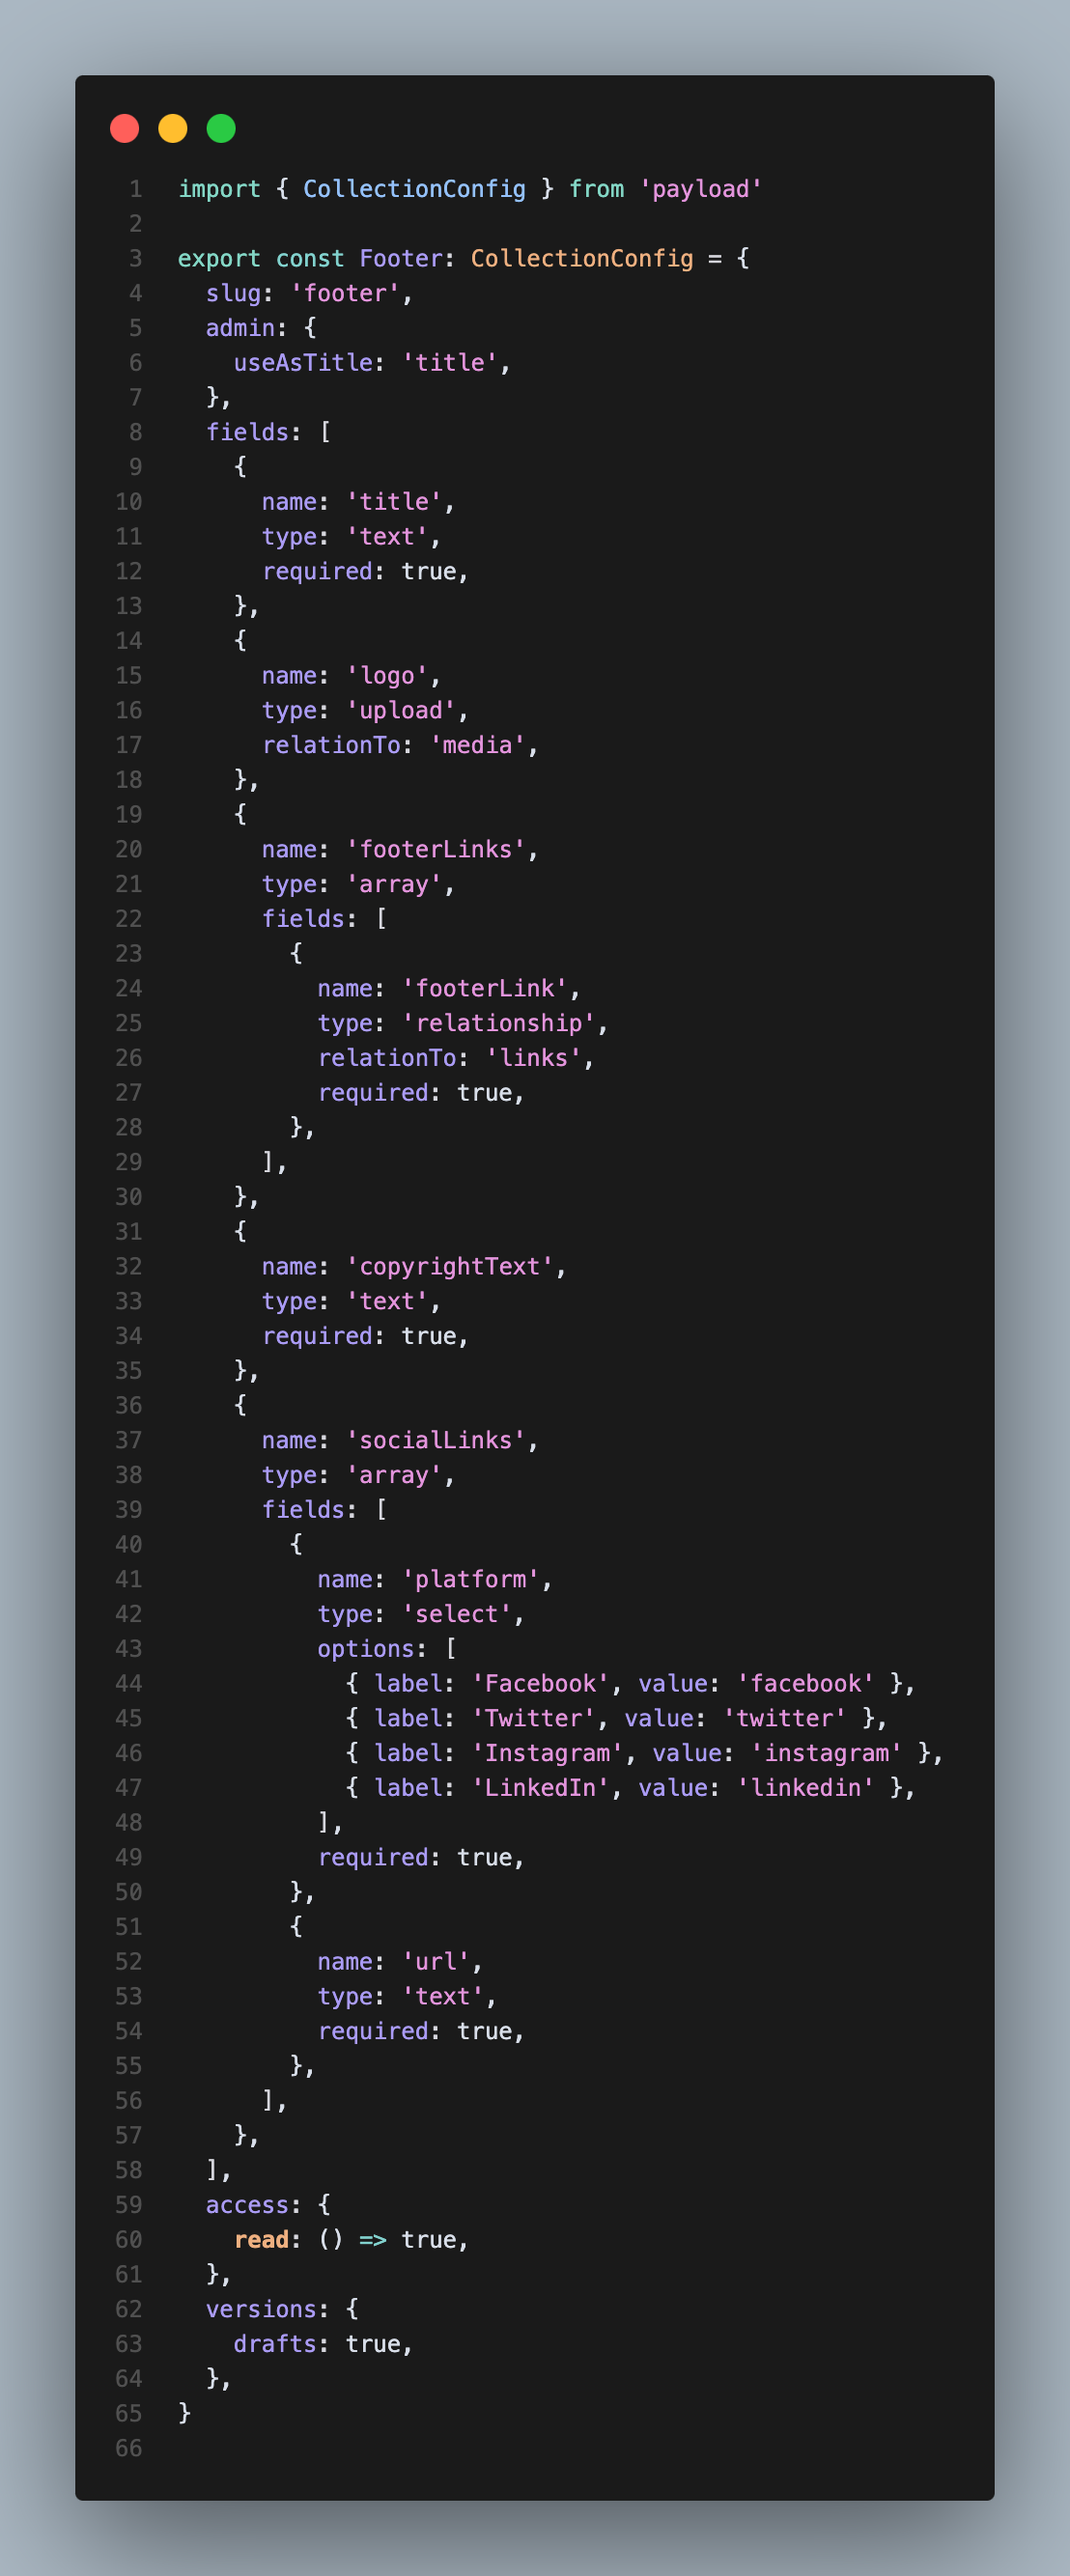
You can edit them as you please, feel free to experiment!
🟣 Create Feature Box Hero block:
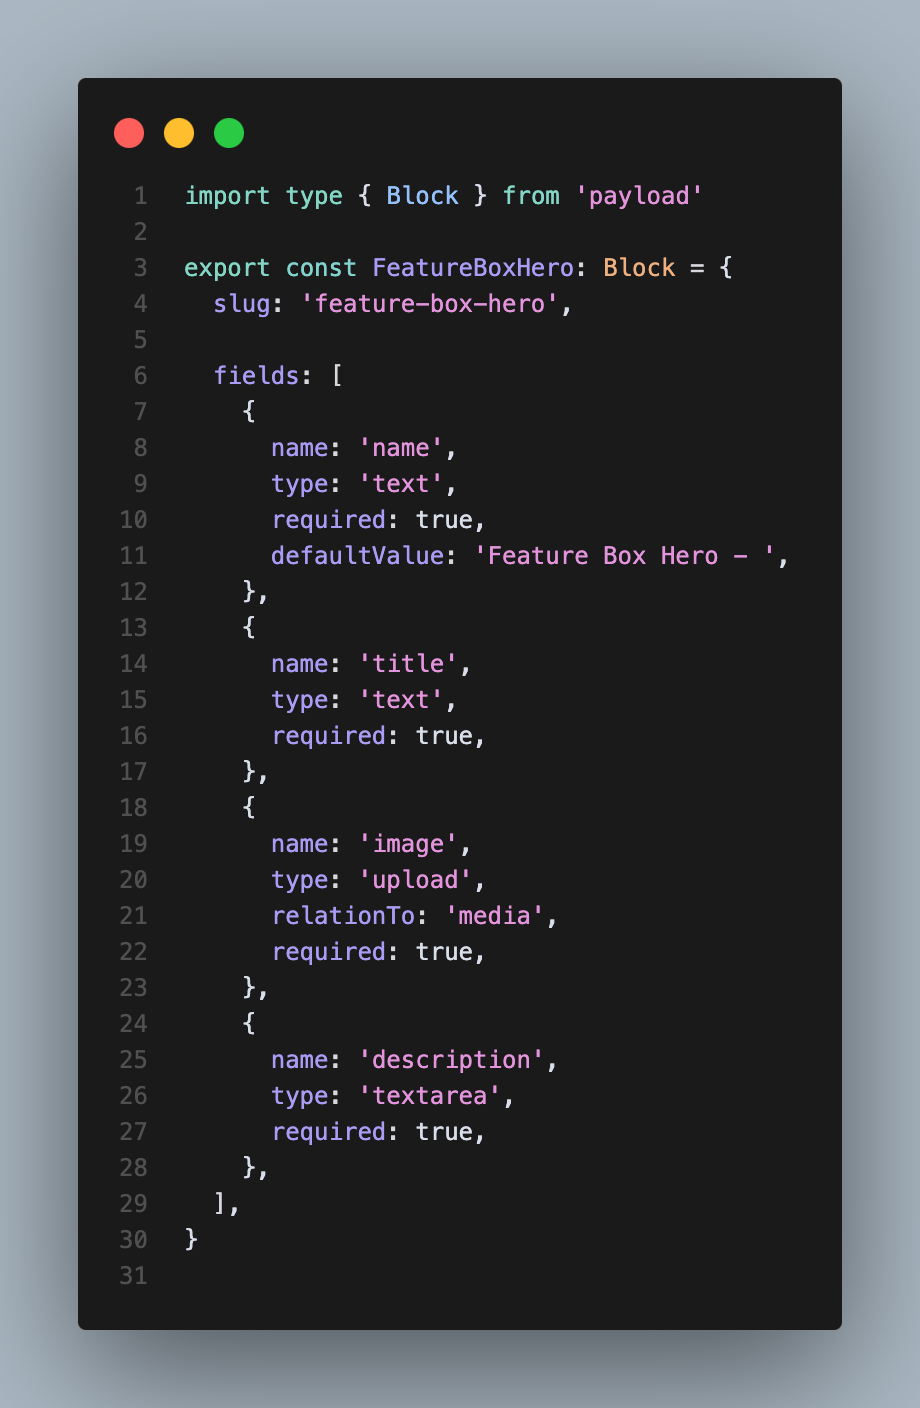
Blocks are a great way to create a flexible content model that can be used to build a wide variety of content types, and also they can be integrated inside rich text.
Add your block inside your page collection
🟣 Add your collections and block to your payload config:

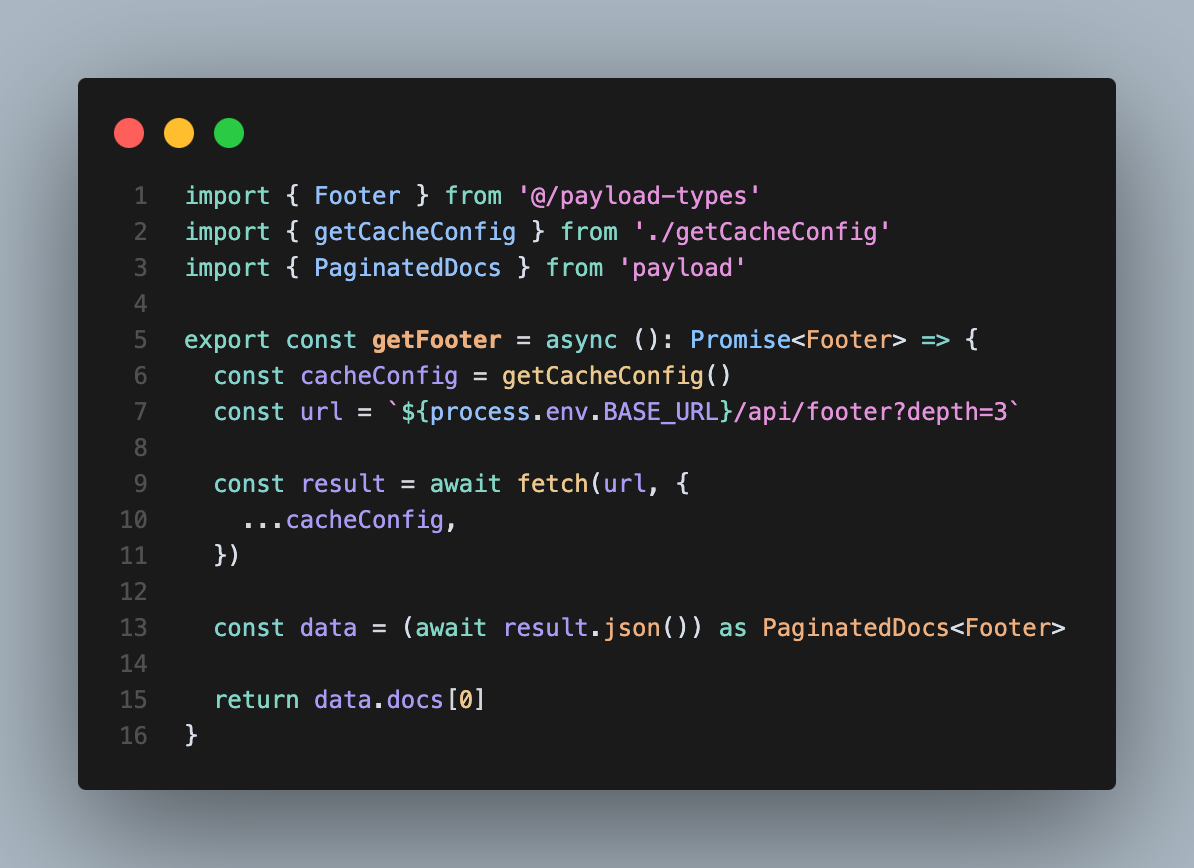
🟣 Add the rendering logic for your header and footer inside your root layout:
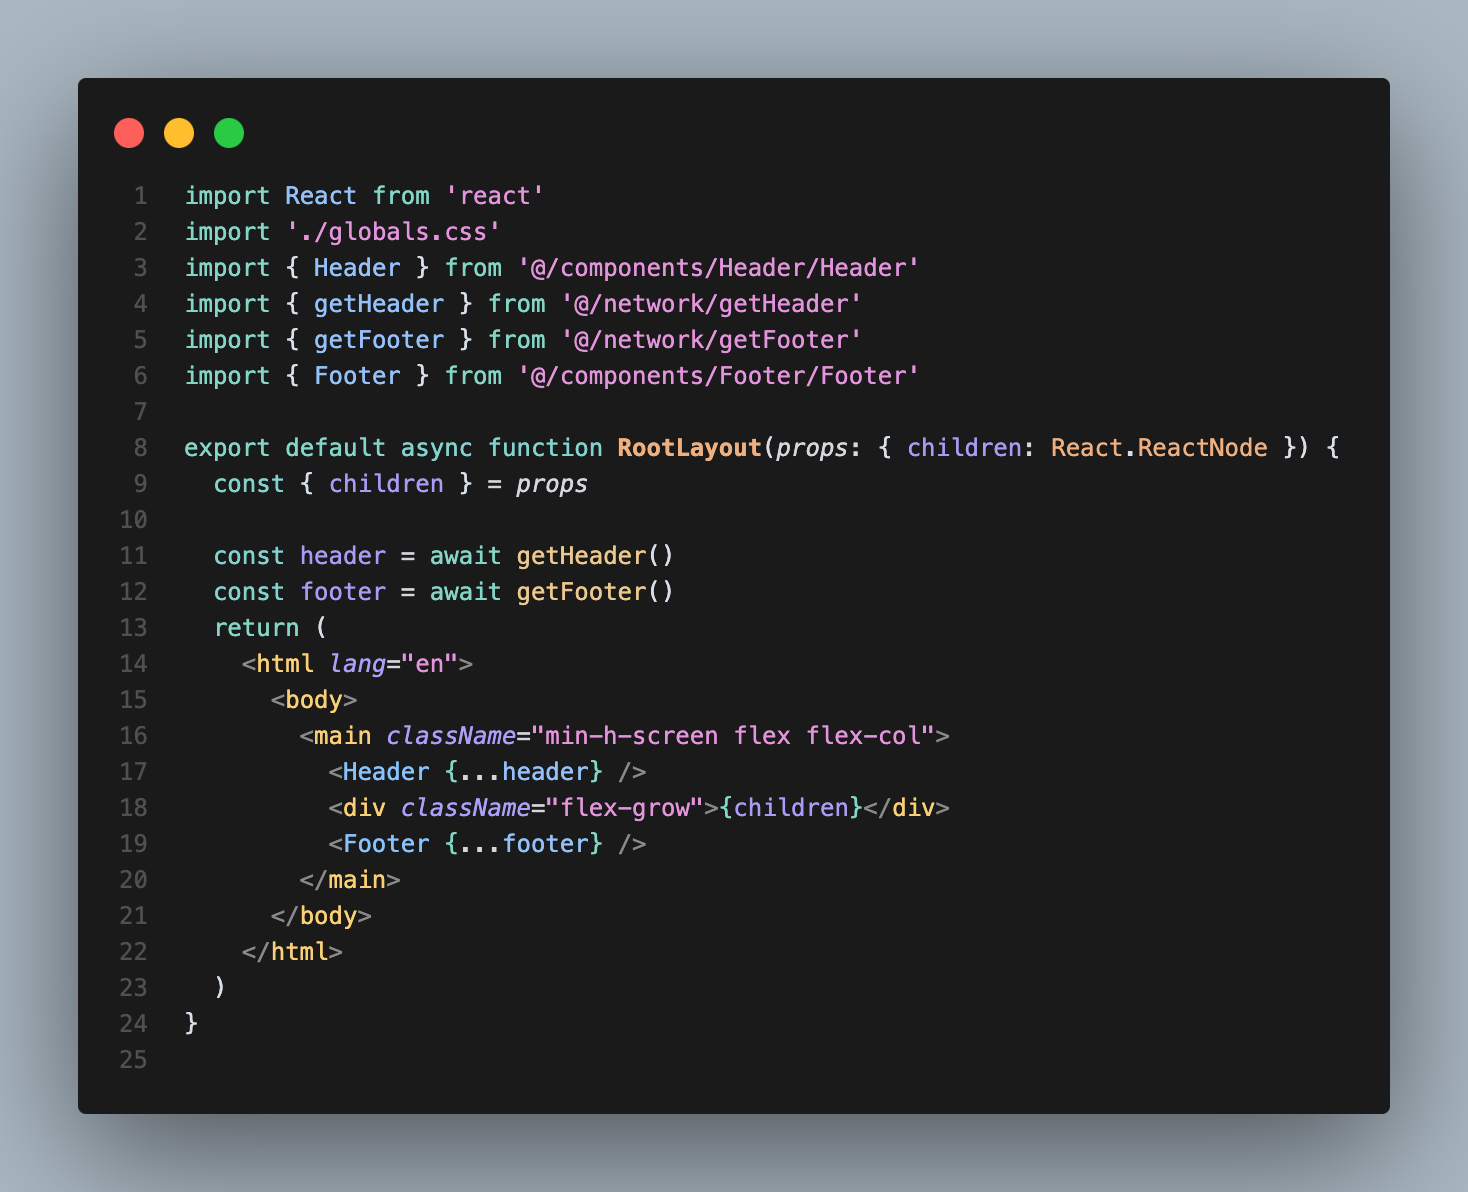
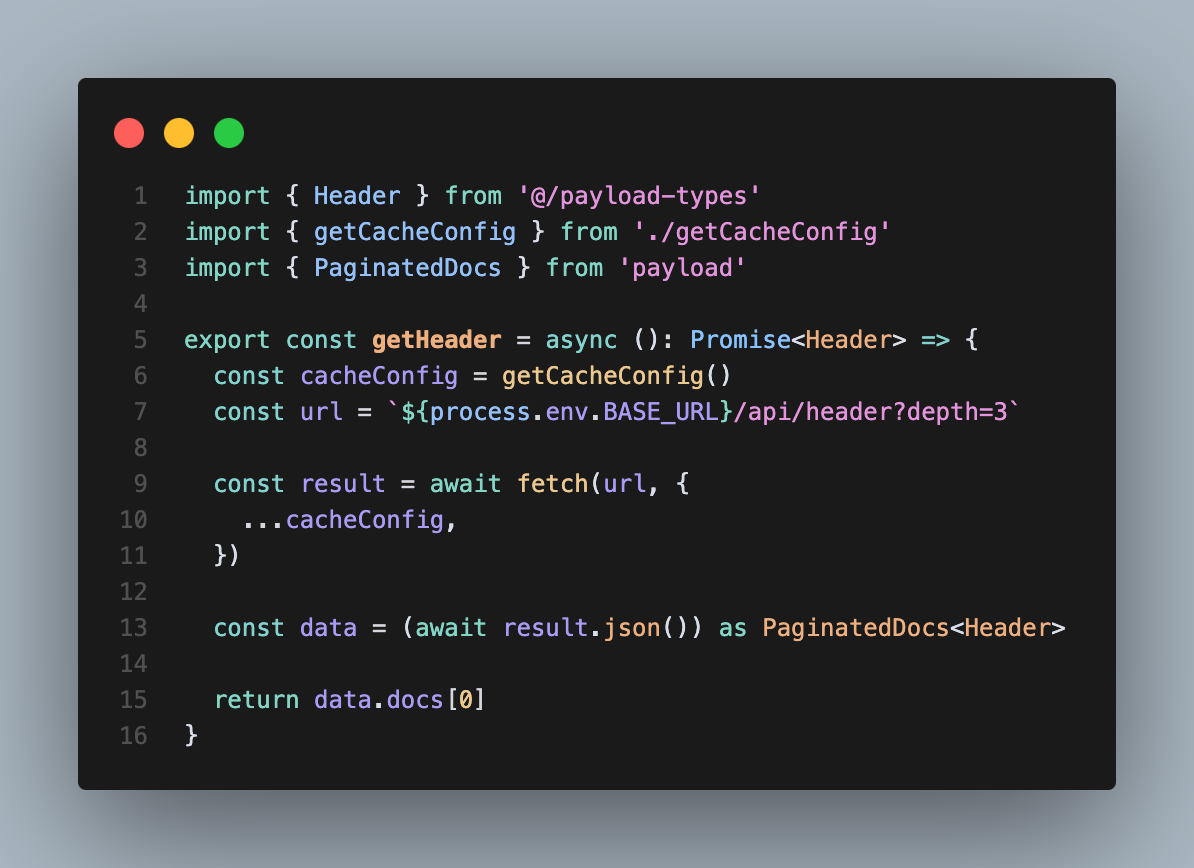
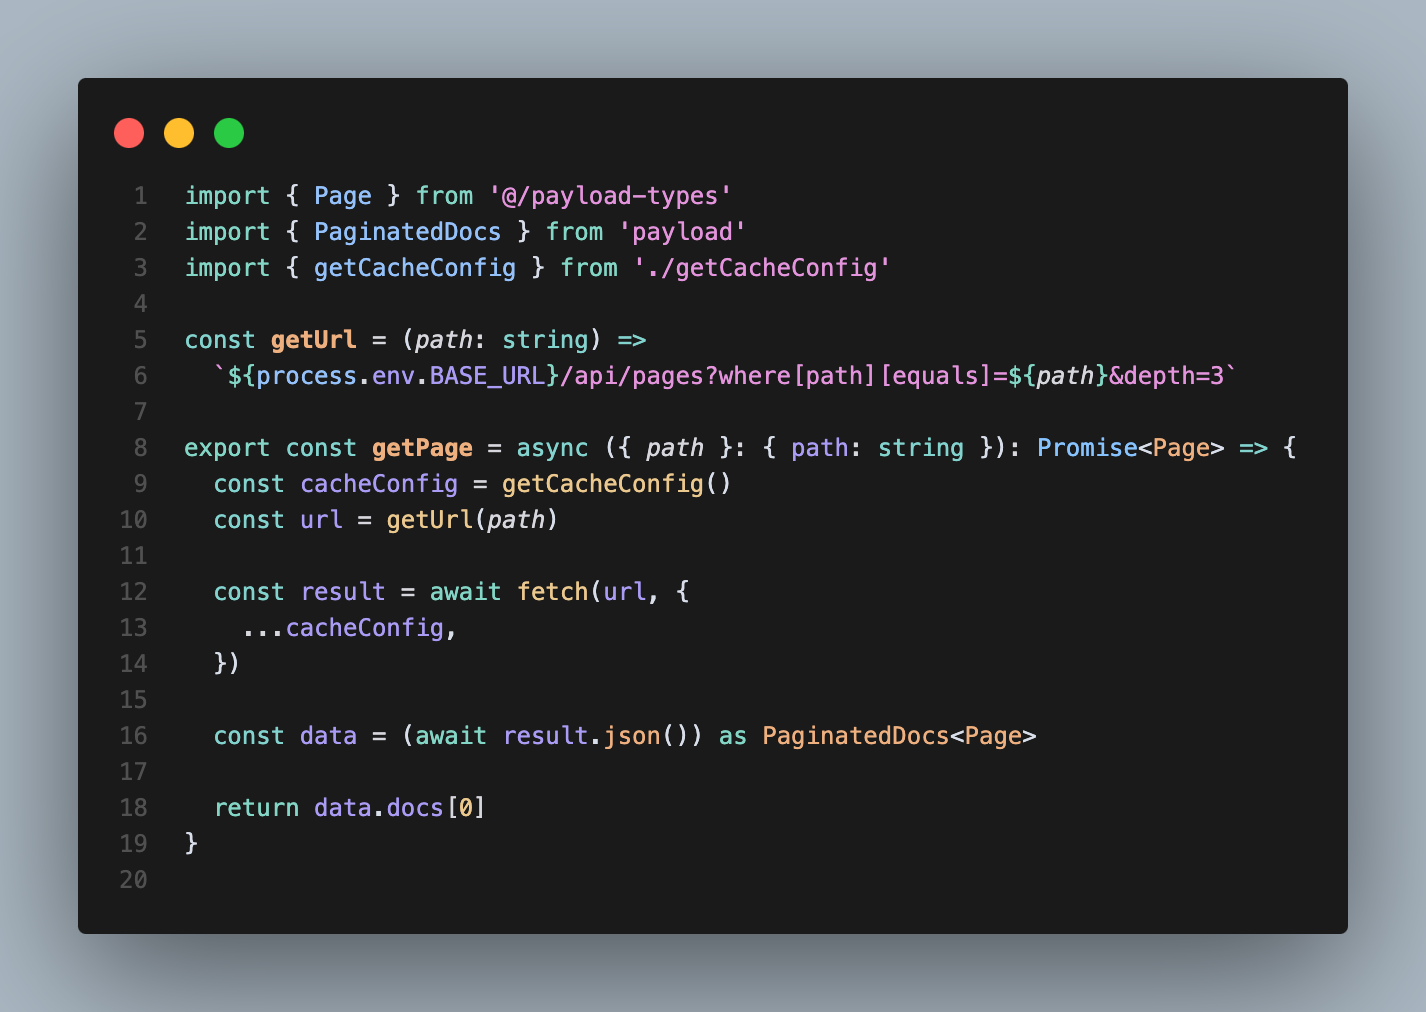
By using payload's REST API you can setup next cache however you like. Also, once you run your project the types for your payload blocks and collections will be created automatically inside payload-types.ts file. (BASE_URL would be the url for your website once deployed to vercel, when you are running the project locally it should be hppt://localhost:3000)
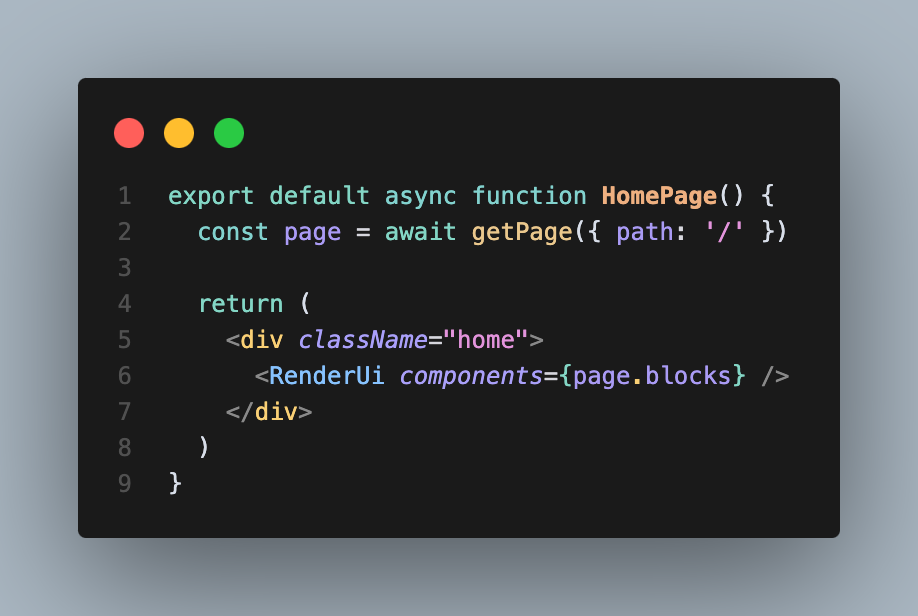
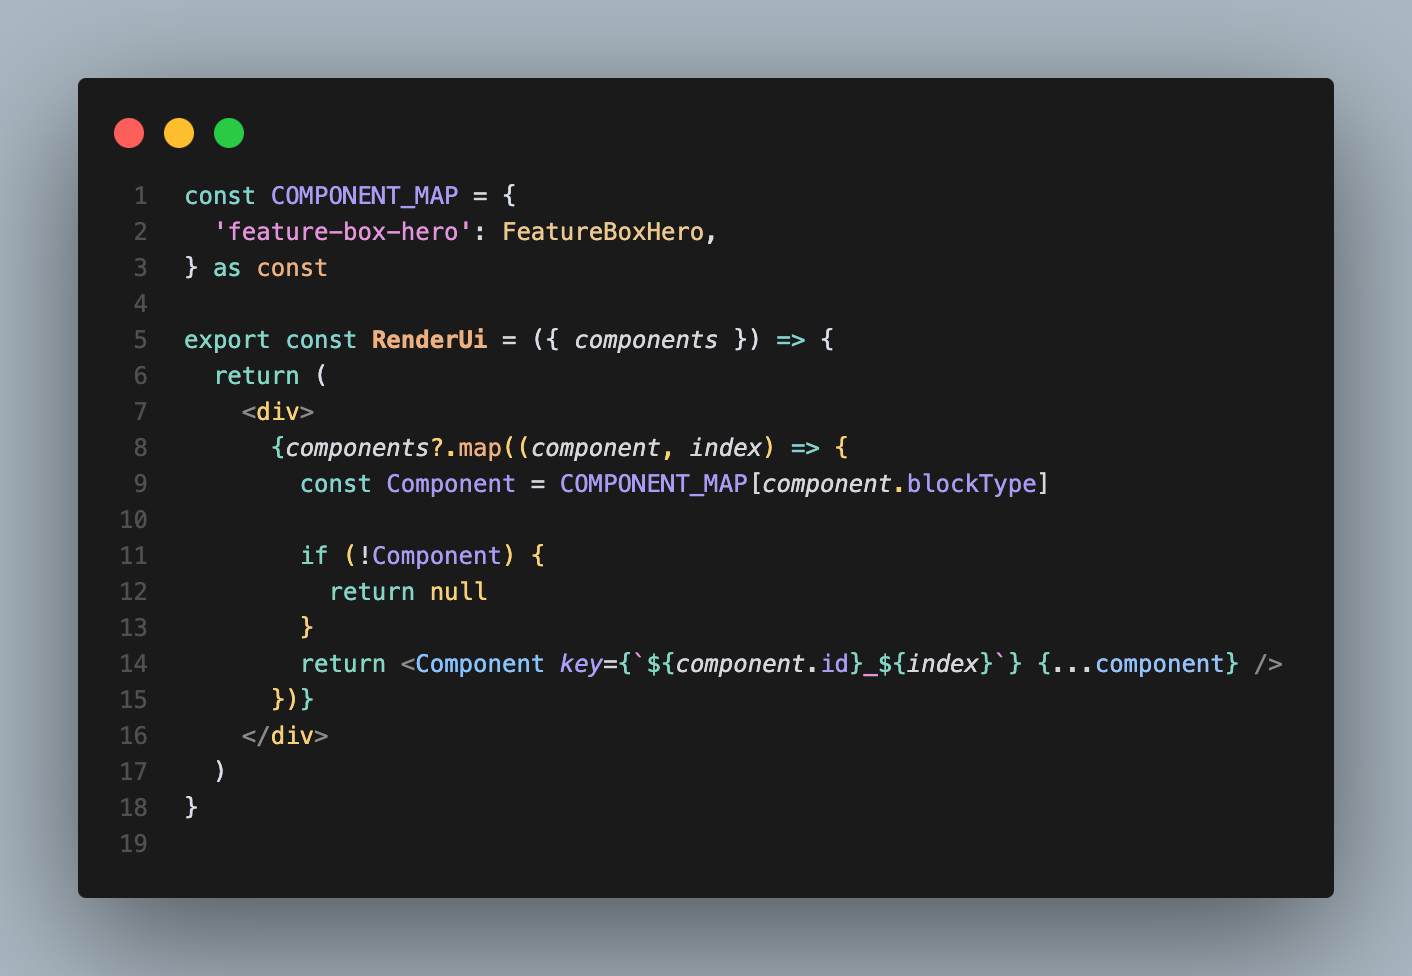
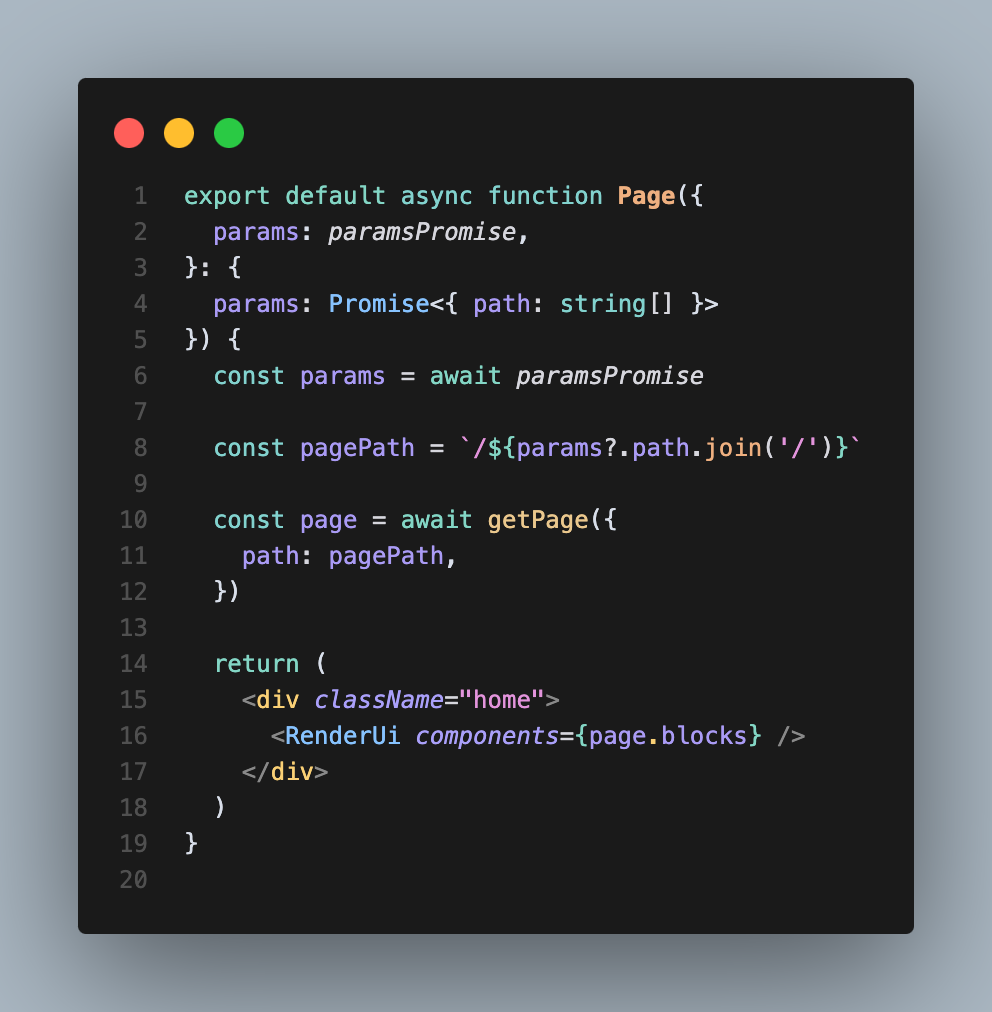
🟣 Add the rendering logic for your blocks inside page.tsx and create [...path]/page.tsx file for dynamic routes:
And now you can run the project with pnpm run dev command!
Under /admin you will be asked to create an user and then you can start playing with your collections and blocks!. Also as you may notice, you can create as many blocks and collections as you want and then easily integrate them inside your payload.config.

Jose Raimondi
Jose is a Front-End Developer with a love for building new things. He finds the idea of working with the latest technologies such as React.js, Next.js, Kentico Kontent, Tailwind CSS, etc, very
thrilling. Coming from a musical background, he sees that software engineering shares something with music, which is creativity. Embracing the challenge of learning more every day, as technology evolves there will always be excitement for him in the field.
Share on social media